Want In-Depth PPC Training?
Visit the ParaCore Academy
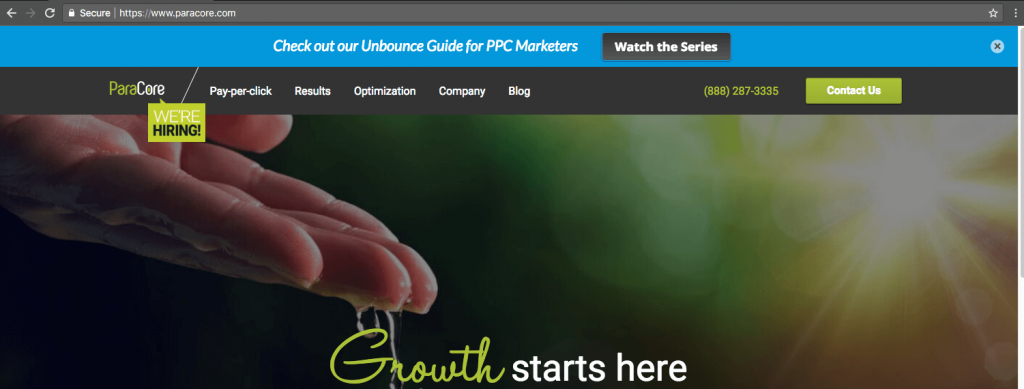
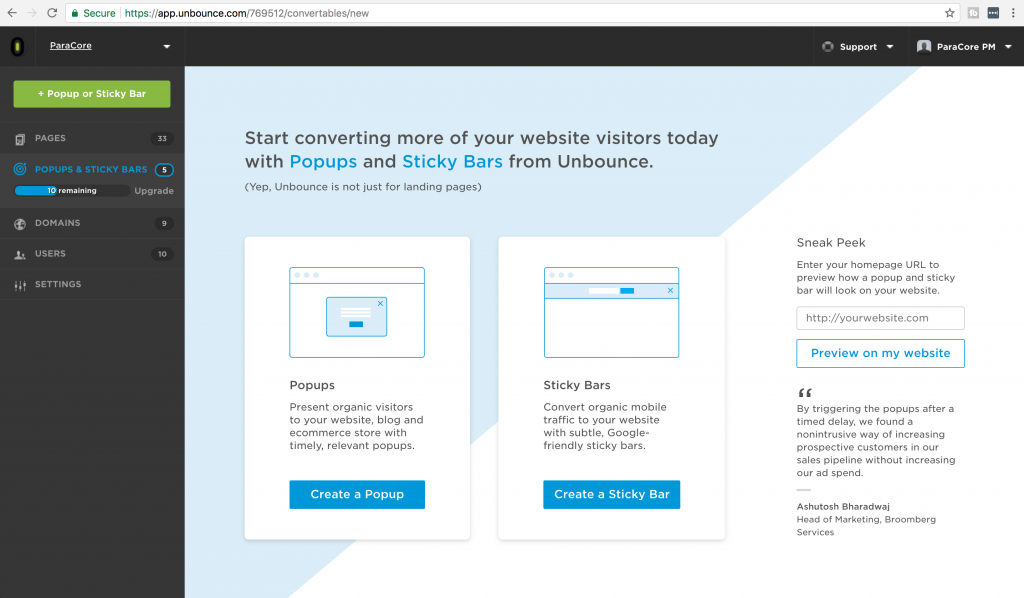
Pop-ups and sticky bars are two Unbounce tools used to elicit an action from your site visitor, with the end goal to get more leads, sign-ups, and sales while they’re still on your page.
A pop-up is a box that appears when a visitor is navigating or reading the content on your site: for example, a newsletter sign-up sheet.
A sticky bar is a banner that appears at the top or bottom of your webpage. It remains in place as the visitor navigates your site, and is a slightly less intrusive counterpart to the popup.
An example of this would be a sale with a “shop now” call-to-action.
From the “Pop-ups and Sticky Bars” page of your account or your client’s account, you can edit the design of current popups or copy them to a client from the dropdown menu.
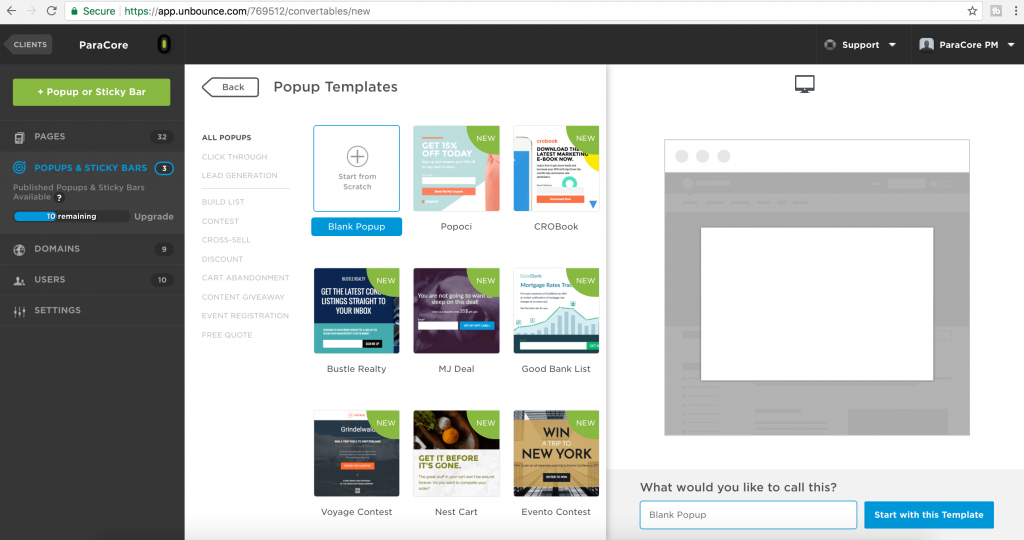
Unbounce makes it simple and easy to create a new pop-up or sticky bar with several templates to choose from if you need inspiration or ideas; otherwise, you can start with a blank pop-up or sticky bar to get your branding just right.
As with the landing page templates, these pop-up templates are separated into subcategories by purpose and motivation.
Huge time saver — THANKS UNBOUNCE!
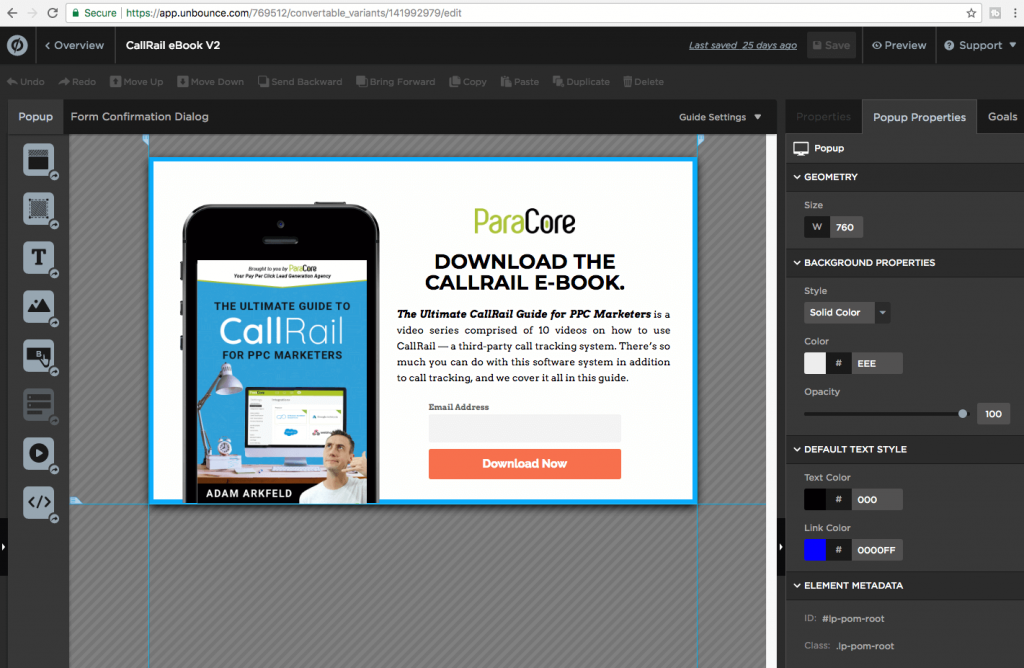
Whether you choose a template or go blank, you start dragging and dropping text, image, and the like into the pop-up.
Once you’ve completed and saved the design, you move on to the overview screen.
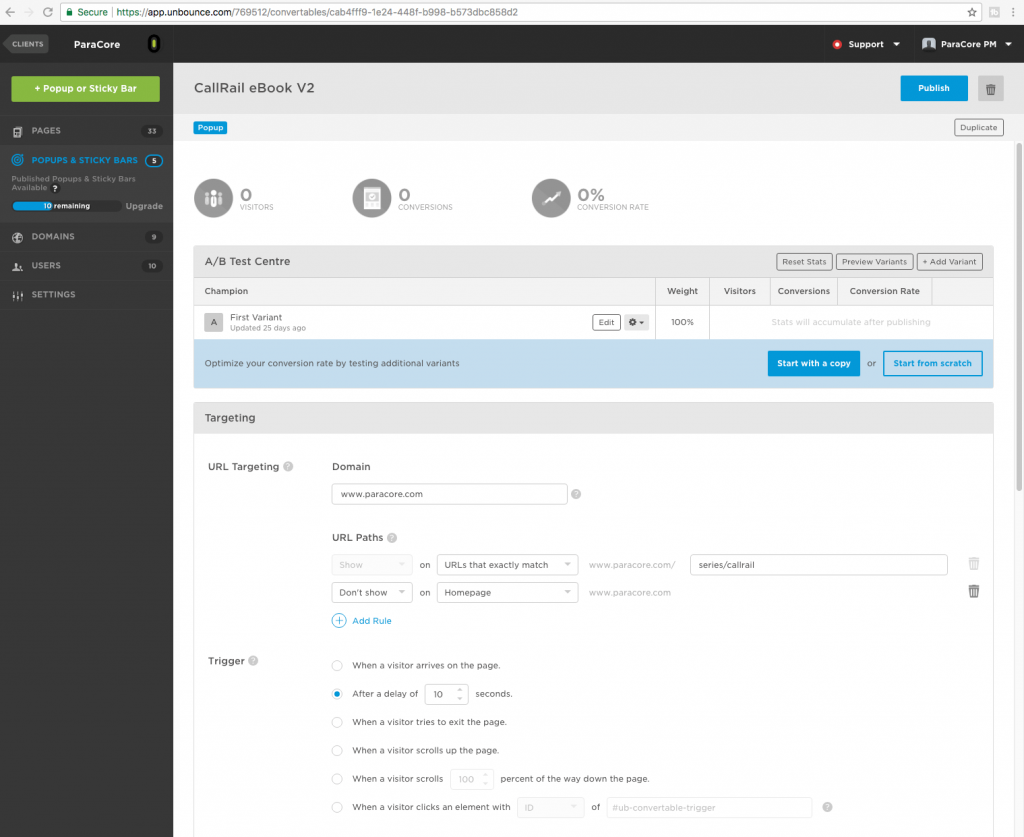
This is where you customize triggers and targeting rules for your pop-up or sticky bar. You can control who sees your offers and when. That way you can serve the most relevant offers to the right audience.
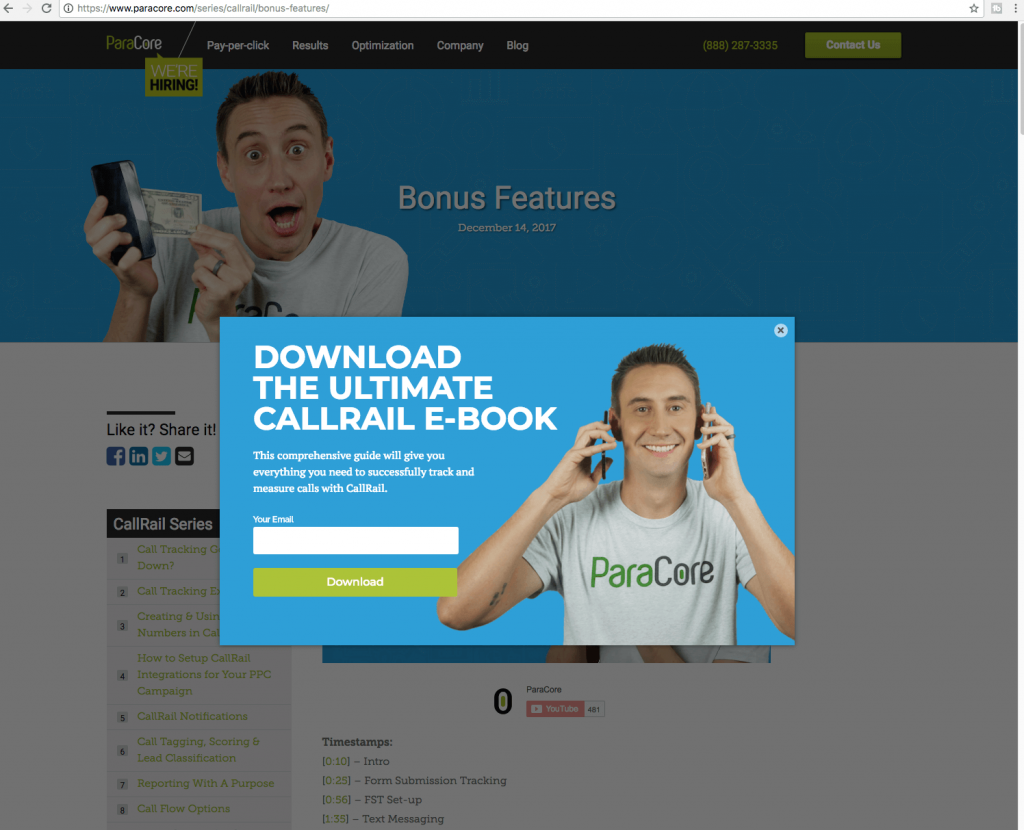
This example is a pop-up offer for a downloadable asset — my CallRail eBook guide. We recently created a comprehensive video series for CallRail’s call tracking software. If you’ve been enjoying THIS series, you should check that one out in the link below.
From the overview page, you can target by URL, meaning you pick the website, landing page, or group of pages where the pop-up will be seen.
In this example, I’m placing it on our site: ParaCore.com
ParaCore Tip: Did you know you can target URLs that contain, match, start with, or end with any text include?
That’s what I’m going to do here: “target” those people that I know are interested in CallRail.
So, I use the URL path that contains “CallRail” to only target those pages.
Next, setting up the “trigger.” The trigger allows you to launch pop-ups and sticky bars when visitors arrive on a page, abandon a page, click an element, scroll down a page, or after a set time delay.
In this example, I set a trigger for a 10-second delay. That means after 10 seconds of being on my blog page, the visitor will see this pop-up offer to download my eBook. I can also set it to pop-up when they scroll to a specific percentage down the page.
This is also an opportunity for one last attempt to capture a lead before they leave. The one minor setback when a visitor tries to exit the page is that the trigger doesn’t work on touch screen mobile devices. Bummer dude.
Next is frequency, which is highly important because you don’t want to drive visitors off your website by being too pushy with your popups and sticky bars.
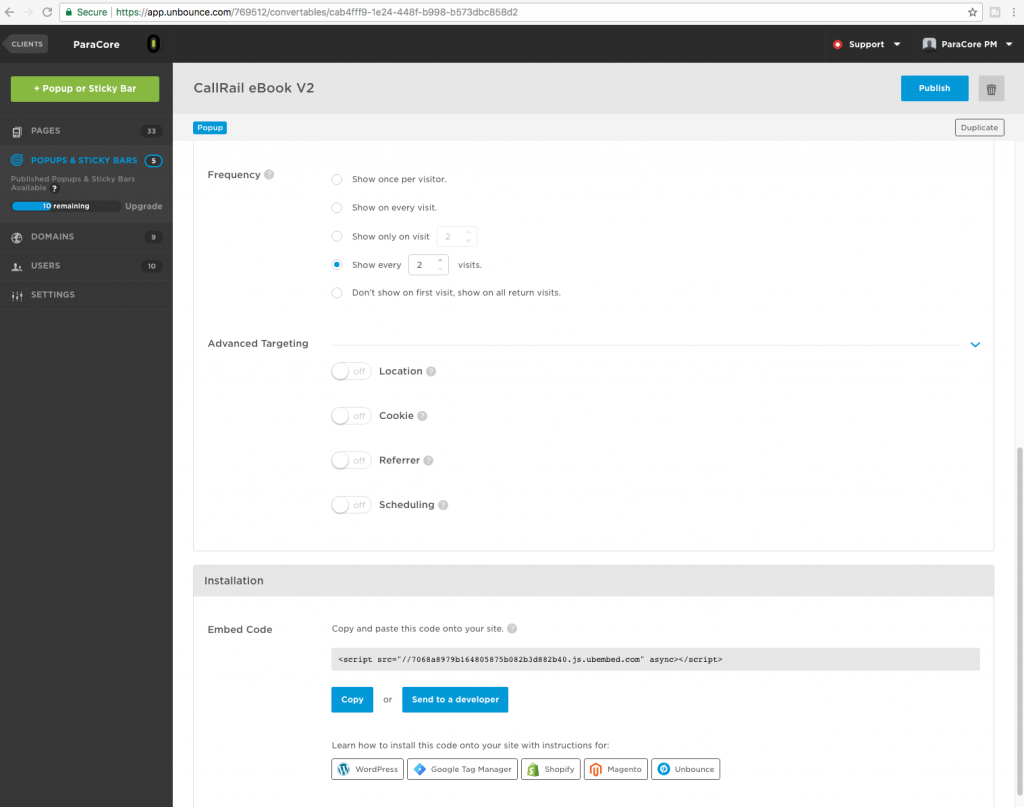
So set the pop-up to once per visitor, or as I did on this pop-up, show the pop-up every two visits.
Now we take it up a notch with advanced targeting.
You have your choice of four advanced targeting options: target by location, target with cookies, target by referring URL, or target by date.
ParaCore Tip: know that these advanced options are only available with the “premium” and higher plans.
Targeting by location is best for getting your regional offers in front of the right visitors by targeting visitors who live in a specific city or country.
You can also exclude visitors who live in a specific city or country.
For example, if you sell bikinis and there isn’t a market for bikinis in Antarctica, where the average weather is 15 degrees Celsius in the summertime, you want to exclude visitors in Antarctica from seeing your pop-up or sticky bar.
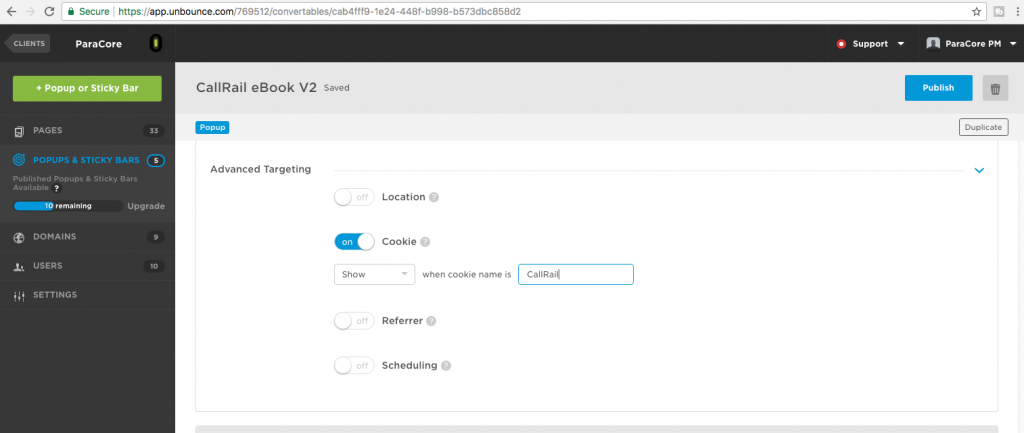
The next advanced option is targeting with cookies. With this option, you can show or hide popups and sticky bars to visitors based on their browsing history, conversion status, previous actions, and much more.
This is based on the presence of a cookie stored in a visitor’s browser. Currently, you can only target by cookie name and not the cookie value.
You would use this option to prevent current customers who may have already purchased a product from seeing ads for that same product.
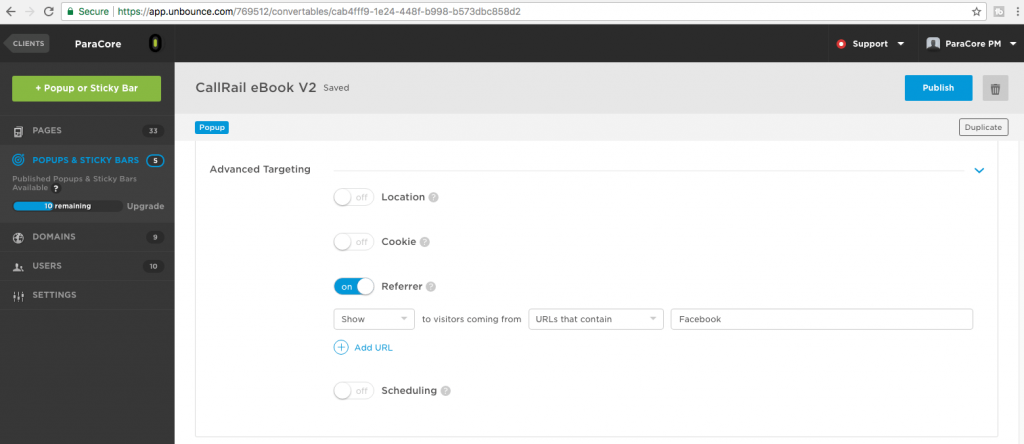
Another advanced option is to target by the referring URL. This option allows you to show different pop-ups and sticky bars to visitors from different traffic sources. For example, from Facebook, AdWords, or an organic search.
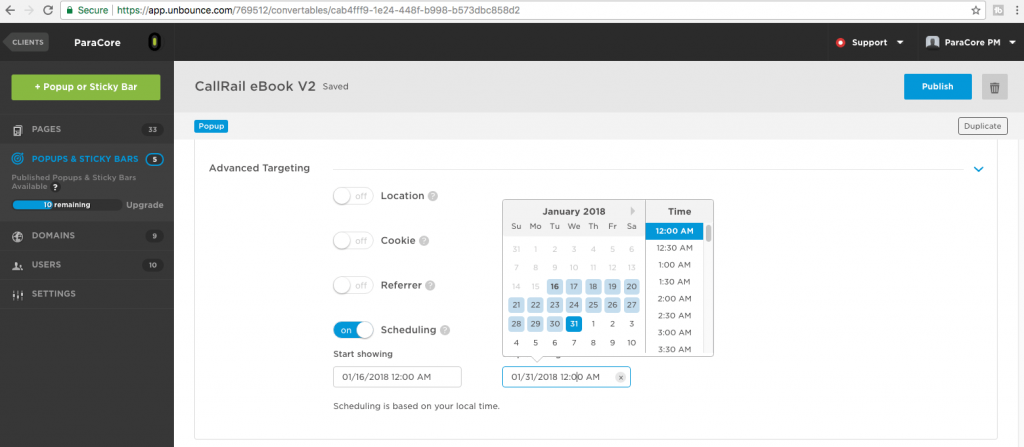
The Final advanced option is to target by date range. This one is self-explanatory. When do you want your popup to start and end? Schedule your sticky bars or popups to start and stop according to a promotion or seasonal campaign.
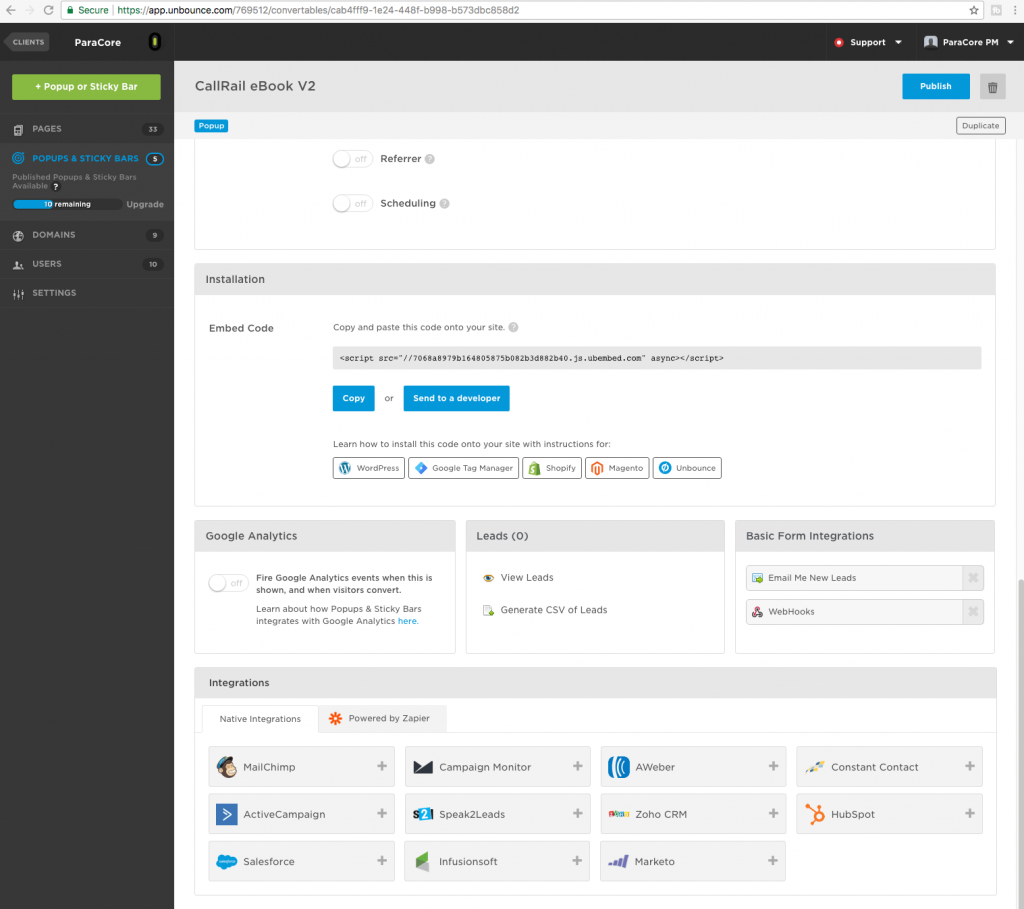
You can also do all of the same integrations with pop-ups and sticky bars that you can do with landing pages. You can automatically pass leads from pop-ups to your favorite email, analytics, or marketing automation tool like Mailchimp or Marketo.
After you customize all of your triggers and targeting rules, copy the embed code, paste it where it needs to go, and now you’ve got popups and sticky bars!
Still have questions, or need some direction? Reach out to us!
Related Posts
- How To Create an Effective Landing Page for Facebook Ads
- WordPress vs Unbounce: What’s Best for Landing Pages?
- How Quizzes Can Boost Your Landing Page Conversion Rate
- Bonus Interview Part II with Ryan Engley!
- Bonus Interview Part I with Ryan Engley!
- Additional Tools Available in Unbounce that Make Your Landing Pages Awesome
- Setting Up and Using A/B Testing for Your Landing Pages in Unbounce
- Unbounce Page Settings: Beneficial Features Explained
- Managing Your Landing Pages in Unbounce
- An Unbounce Screencast on Building Landing Pages for Your PPC Marketing
- Navigation and Features: Successful Landing Pages Using Unbounce
- Unbounce the Go-to Landing Page Builder
- The RIDICULOUSLY Simple Guide to Using Unbounce for Your PPC Marketing
- Overview of Unbounce Landing Pages
Want In-Depth PPC Training?
Visit the ParaCore AcademyCurious how we can improve your campaigns?
Schedule some time to chat with our team so we can learn more about you and your business.
