Want In-Depth PPC Training?
Visit the ParaCore AcademyTimestamps:
[0:02] – Intro
[0:46] – Integrations
[1:22] – IP Filters
[2:05] – Email Template
[2:30] – Labs Features
[3:10] – Script Manager
Transcript:
The Unbounce settings section contains client-wide settings that apply beyond just a single landing page. This is where you will set up integrations into third-party systems, domain-wide scripts, and email notification templates. Some of the items may look more technical. Never fear, Unbounce allows you to create more advanced landing pages without the use of a developer.
I’m Adam Arkfeld, owner of ParaCore, a pay-per-click lead generation agency. This is the 6th of 9 videos in my RIDICULOUSLY Simple Guide to Using Unbounce – an online landing page builder. This is a comprehensive video series focused on helping marketers like YOU dominate the marketing industry by using Unbounce to convert more prospects with relevant landing pages.
If you want to skip ahead to a specific section in the video, check out the description below. I’ve included an outline with time stamped links.
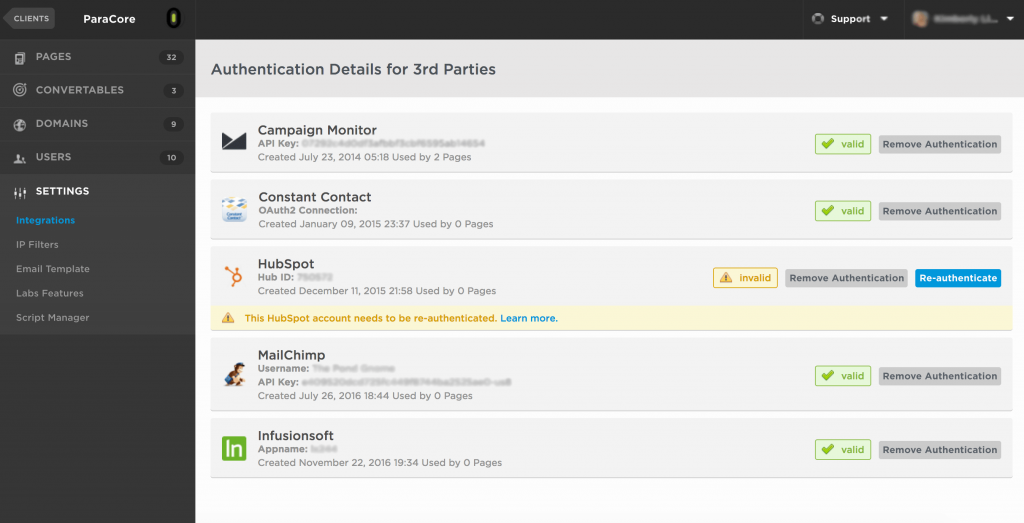
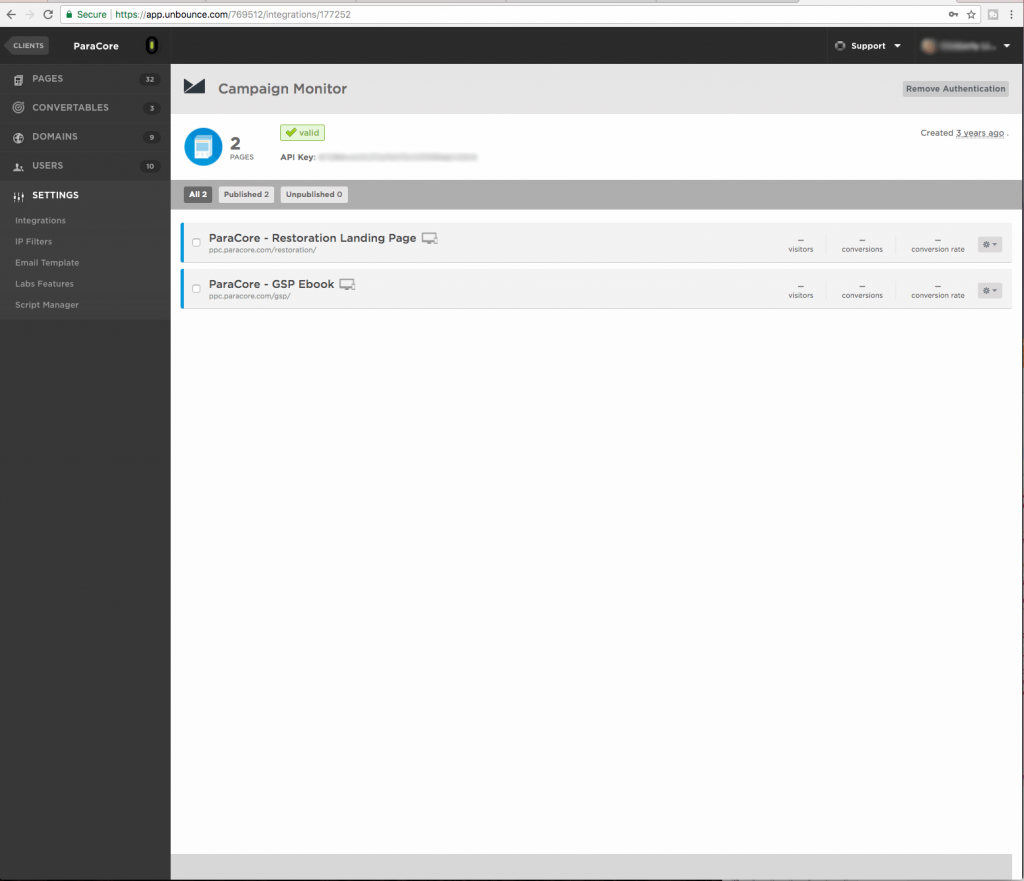
Now, let’s talk integrations. As a reminder, each integration is first set up on an individual page and we covered that in the previous video. The integrations view in settings gives you a bird’s eye view of all integrations for the client’s account. This view allows you to see operational status of each integration, whether it is currently valid or invalid and may need an action. You can also see when the integration was created and additional app-specific information like API keys. If you have several integrations and would like to see which pages are utilizing a specific app, you can click the app name, and view all the integrated pages.
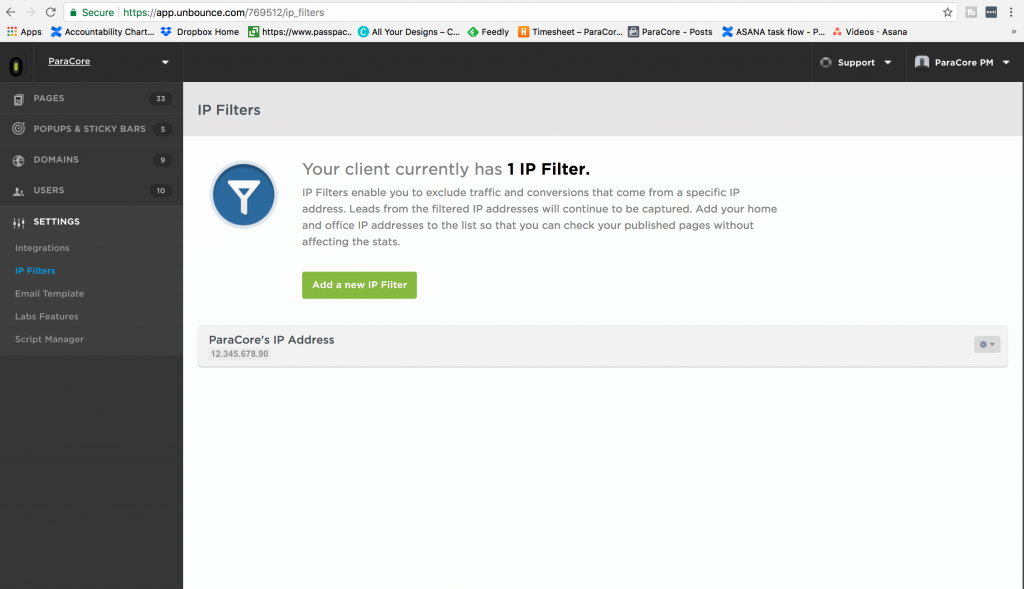
IP filters are a great way to be able to test your site, without interfering with the statistics. For example, you don’t want your internal employee or external client clicks to your landing page to be counted as traffic, a view, a lead, or a conversion, so you would exclude all internal IP addresses within the company network.
As you can see the only filter I have in place is for ParaCore’s IP Address because my team of account managers and developers are constantly updating and working on our landing pages, and our client’s landing pages. We want accurate lead information coming in, so we don’t want our internal testing to count as real traffic. It’s a good idea to include your office, the client’s office, and home IP addresses, so you’re not affecting your stats.
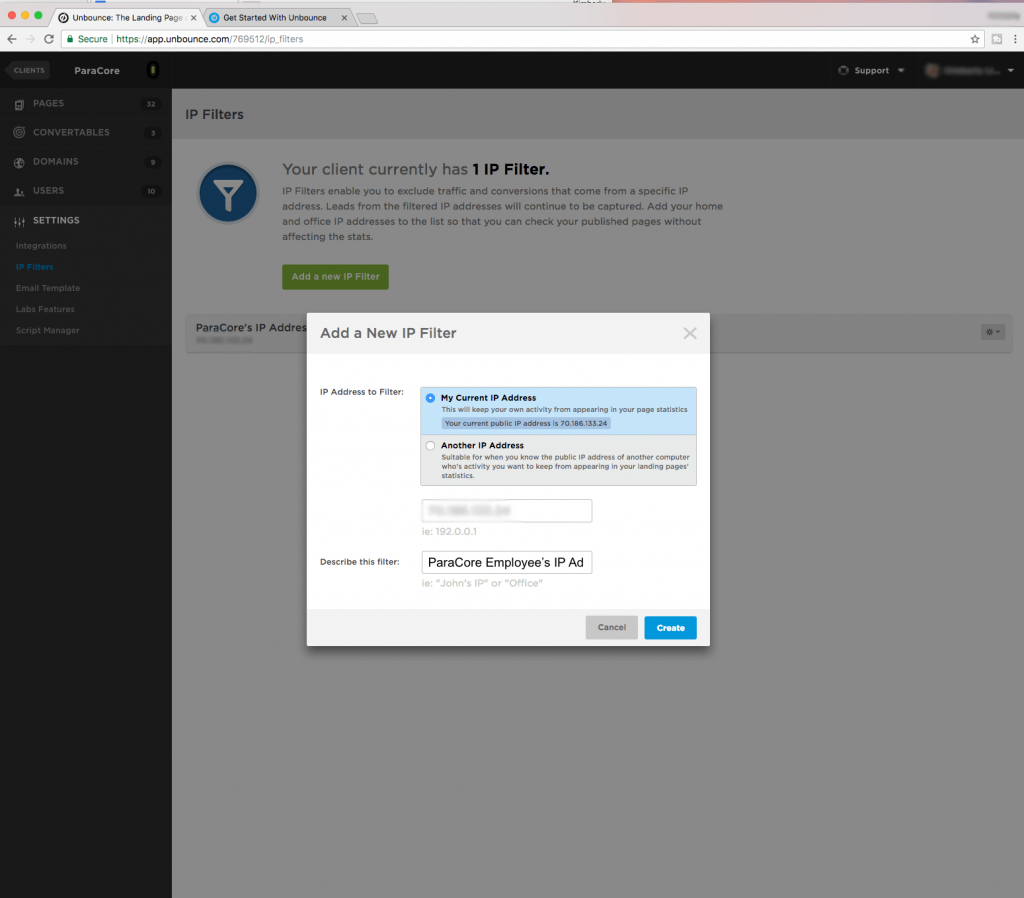
You have the option to filter your current computer’s IP address or manually enter one, if you have it available.
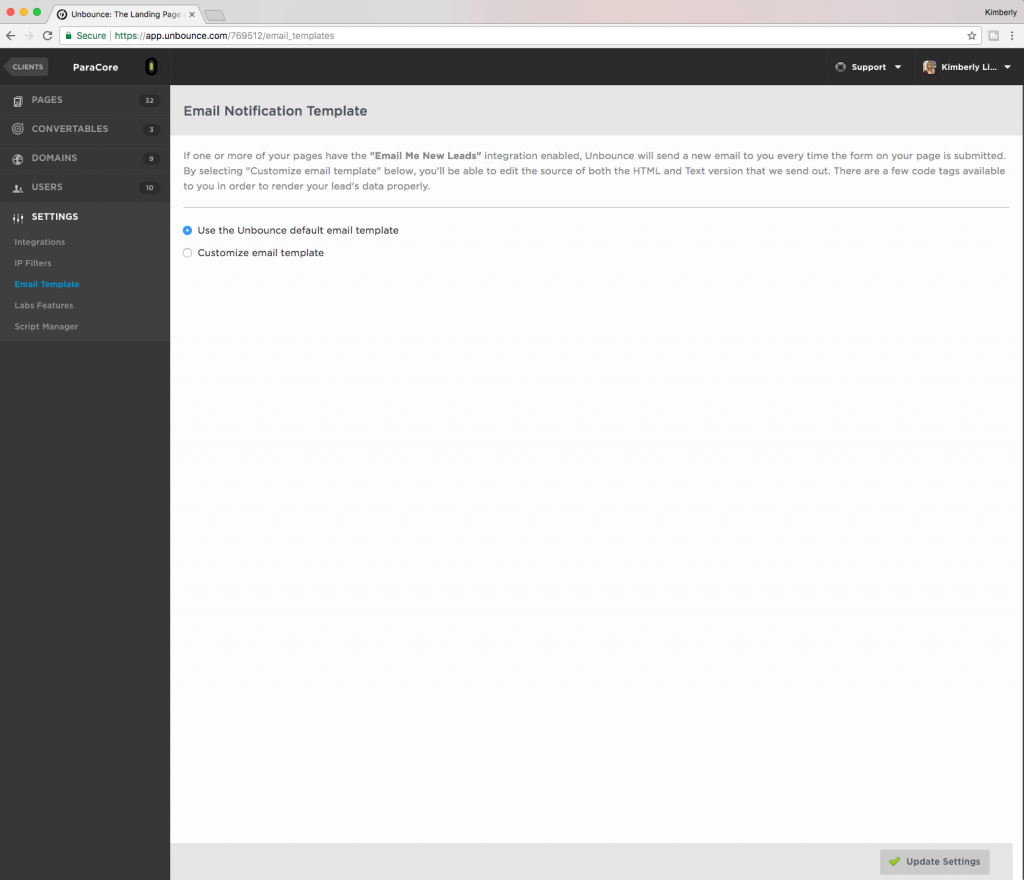
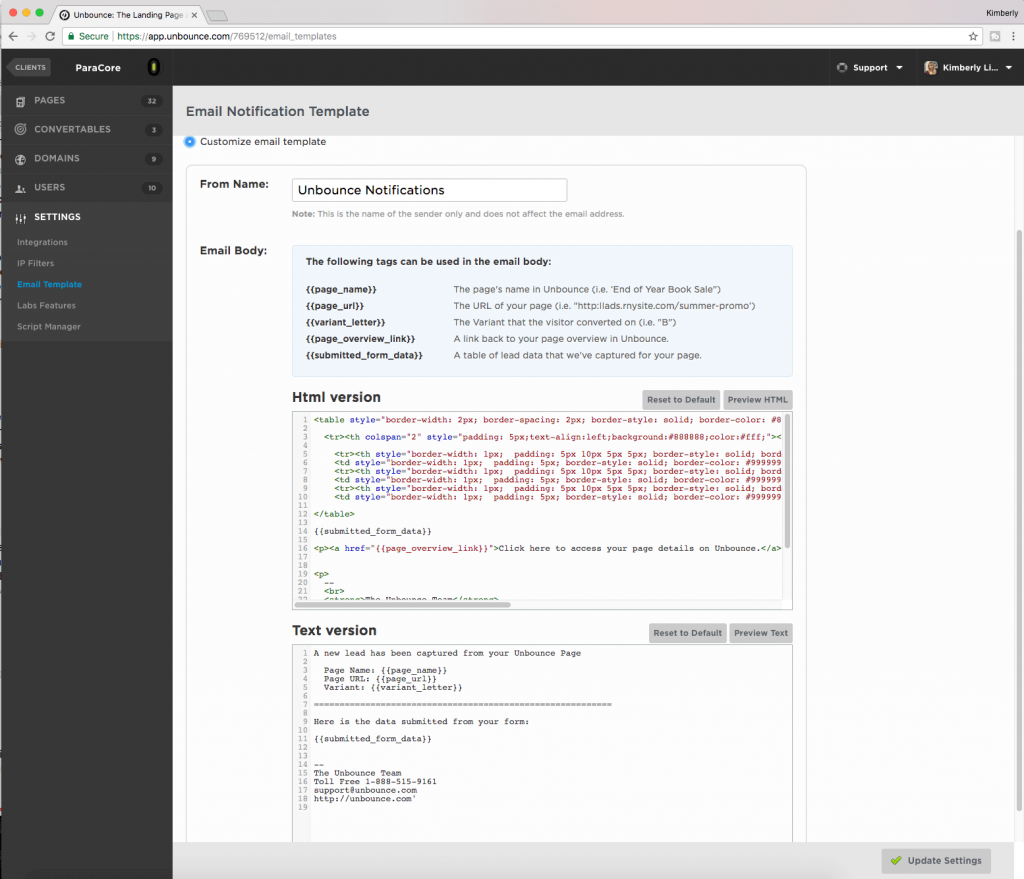
The email template setting allows you to change the email lead notification. The default Unbounce template is generic but suitable to most needs. However, if you want to customize your email template this is where things can get gnarly.
As you can see, there’s a WEE bit of coding involved. There are suggested tags and variables that you can use when creating source fields, but if you don’t know code, just go with the Unbounce default email template, which will provide you with all of the collected information from your lead forms.
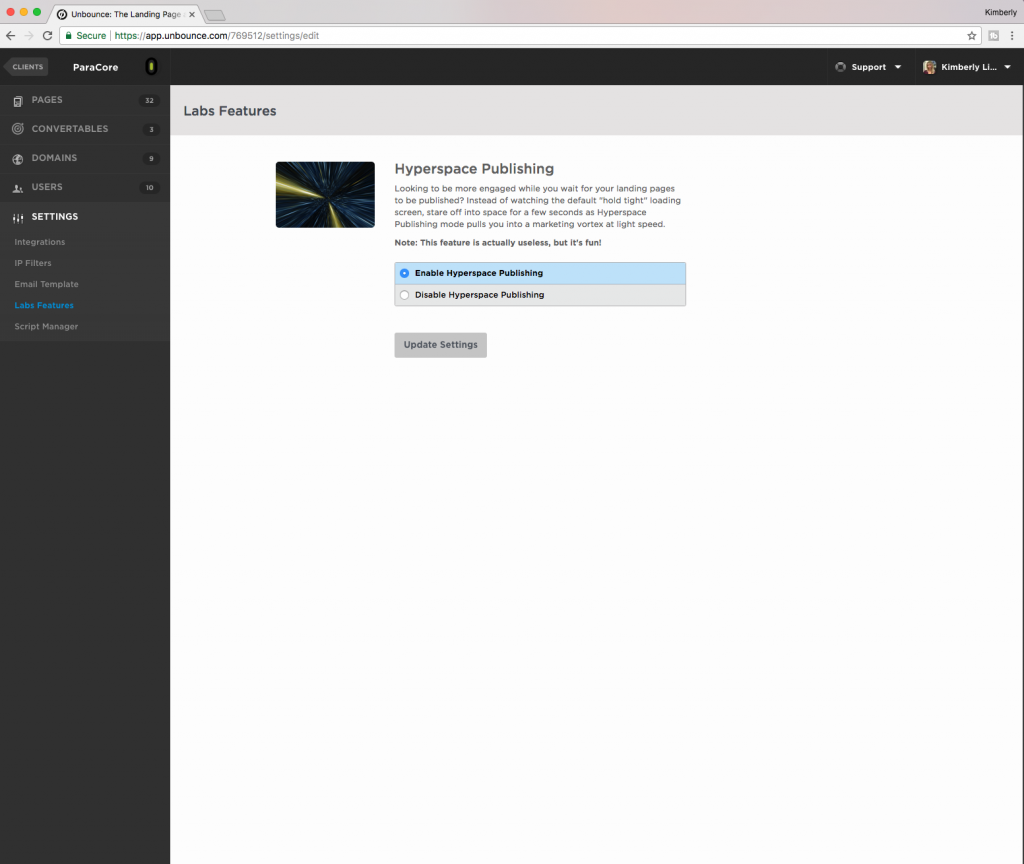
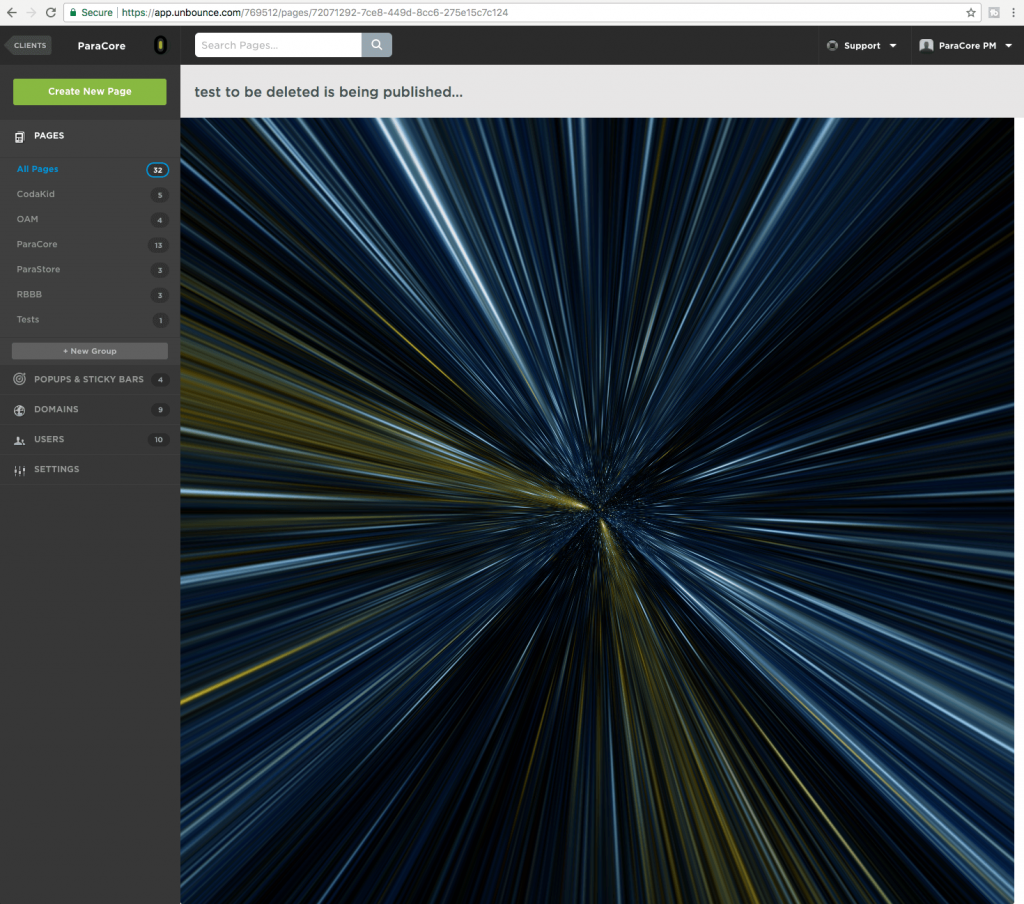
The “Labs Features” is a fun section of the settings menu. This section is where Unbounce allows you to enable features that are currently in beta and not quite ready for primetime. At the time of this recording, the only lab feature is “Hyperspace” a super sweet space scene that you’ll see as you’re waiting for your landing page to be published.
The feature is useless but WAY better than starting a line of text commanding you to “hold tight” while you wait for the page to finish.
Seriously, it’s one of our — and by our I mean it’s Dustin’s favorite loading screens of all time because he met the guy who created it at CTA Conf, in Vancouver — MOVING ON…
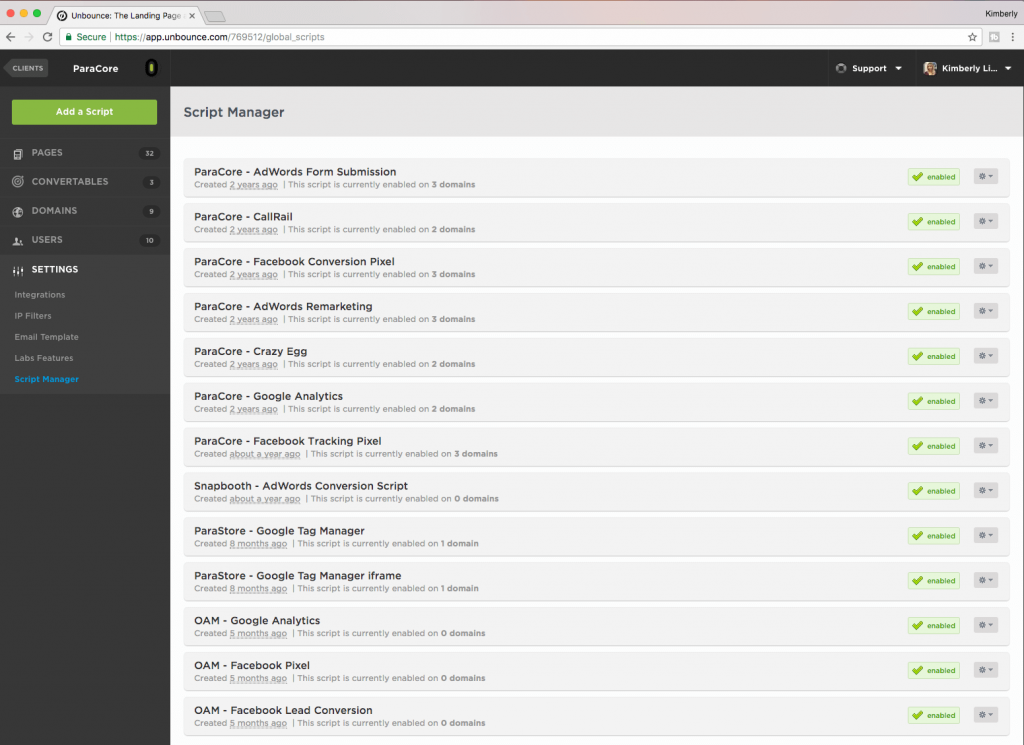
One of the more powerful sections of the settings menu is the Script Manager. This allows you to assign domain-wide javascript snippets to all pages using your selected domains. You can easily add Google Analytics, Tag Manager, or custom code without needing a developer.
One of the fundamental purposes of a javascript snippet in the script manager is to track conversions through a form submission. We handle a lot of scripts for different clients and can easily add Google Analytics, Call Tracking, and conversion tracking for Google and Facebook. Again, all without the need of a developer. BOO-YAAAA!
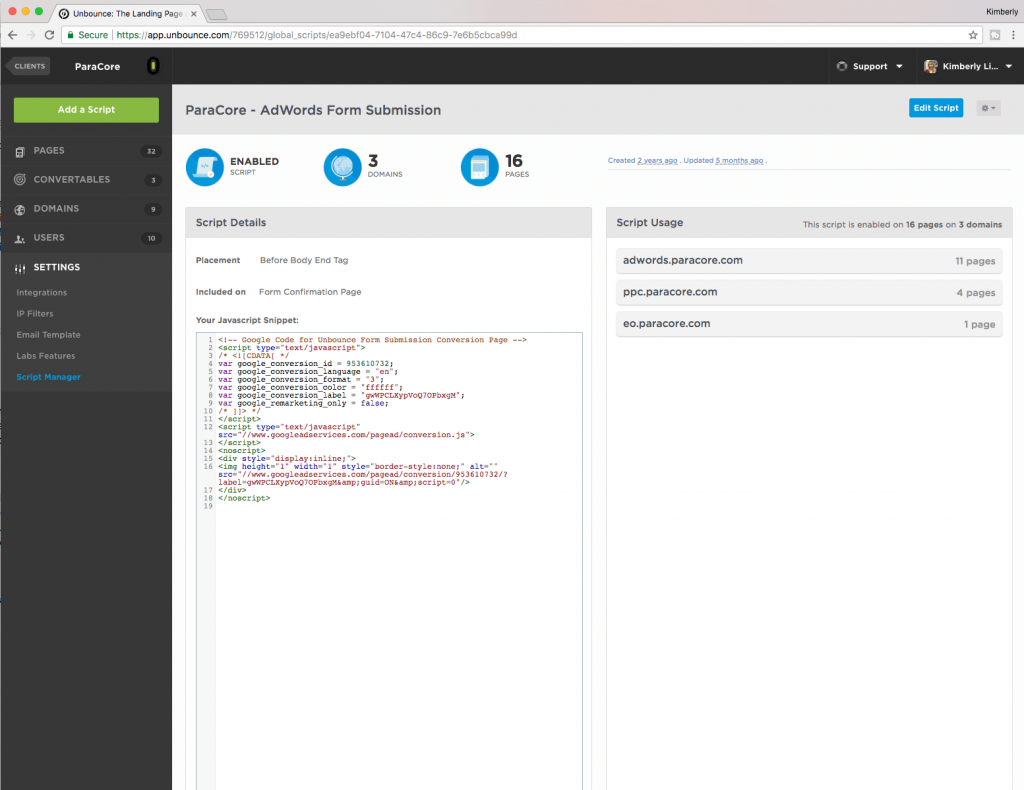
When you go to add a script, this is the screen where you’d paste the javascript snippet provided to you by AdWords, Facebook, or whatever platform you’re using. You pick the placement of the script, which can be in any number of places. Typically, the platform will provide instructions on the best placement for each script.
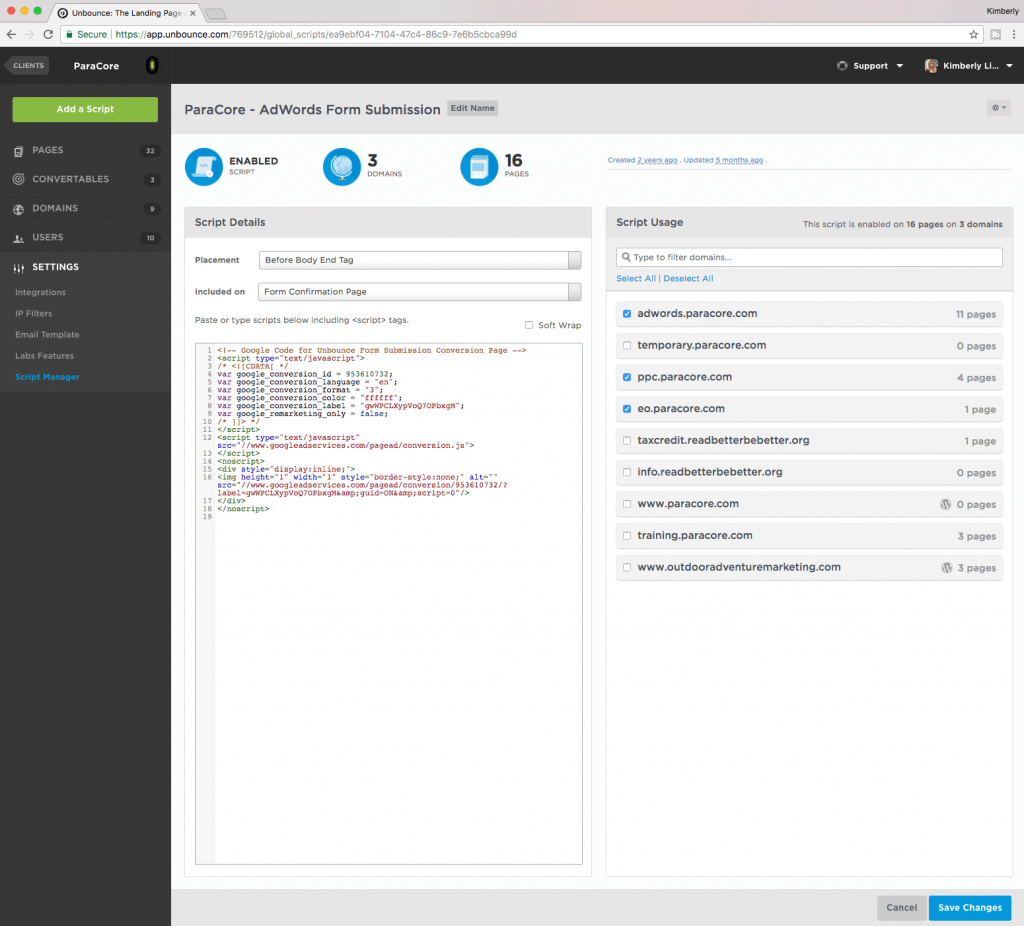
For example, AdWords conversion pixel recommends “Before Body End Tag.” So, on this snippet, that’s the placement we select. This snippet is for a form submission. I also have the option of including it on the form confirmation page, which is typically a “thank you” page after the visitor submits their form.
From this screen, you can edit your script and check the box next to each domain on which you’d like to have the snippet enabled.
That wraps up the features in the Unbounce settings menu. In the next video we’ll be covering A/B Testing, where I’ll be showing you how to test different variants from your champion variant. If you enjoyed this video, please click that like button below and if you want to be notified the second I release a new video, make sure you click the red subscribe button. As always, if you have any questions or need some direction, I’m your man, just leave a question or comment below and I’ll see you in the next video!
Related Posts
- How To Create an Effective Landing Page for Facebook Ads
- WordPress vs Unbounce: What’s Best for Landing Pages?
- How Quizzes Can Boost Your Landing Page Conversion Rate
- Bonus Interview Part II with Ryan Engley!
- Bonus Interview Part I with Ryan Engley!
- Additional Tools Available in Unbounce that Make Your Landing Pages Awesome
- Using Popups and Sticky Bars in Unbounce to Convert Visitors into Customers
- Setting Up and Using A/B Testing for Your Landing Pages in Unbounce
- Managing Your Landing Pages in Unbounce
- An Unbounce Screencast on Building Landing Pages for Your PPC Marketing
- Navigation and Features: Successful Landing Pages Using Unbounce
- Unbounce the Go-to Landing Page Builder
- The RIDICULOUSLY Simple Guide to Using Unbounce for Your PPC Marketing
- Overview of Unbounce Landing Pages
Want In-Depth PPC Training?
Visit the ParaCore AcademyCurious how we can improve your campaigns?
Schedule some time to chat with our team so we can learn more about you and your business.
