Want In-Depth PPC Training?
Visit the ParaCore AcademyTimestamps:
[0:02] – Intro
[0:46] – Begin tour
[1:20] – Page dashboard
[2:00] – Client sub-accounts
[2:45] – Pages list
[3:00] – Traffic report
[3:25] – Download your leads
[4:00] – Left-side menu
Transcript:
Do you get a little lost sometimes when you’re getting accustomed to a new platform? It’s not always easy to acclimate to a new interface. It can also be annoying when you run across a feature you weren’t aware of after months or even years of using the platform. But don’t worry, I won’t let that happen to you! Today, I’m your virtual concierge and will give you a lay of the land for Unbounce’s interface and features.
I’m Adam Arkfeld, owner of ParaCore, a pay-per-click lead generation agency. This is the 3rd of 9 videos in my RIDICULOUSLY Simple Guide to Using Unbounce – an online landing page builder. This is a comprehensive video series focused on helping marketers like you dominate the marketing industry by using Unbounce to convert more prospects with relevant landing pages.
If you want to skip ahead to a specific section in the video, check out the description below. I’ve included an outline with time stamped links.
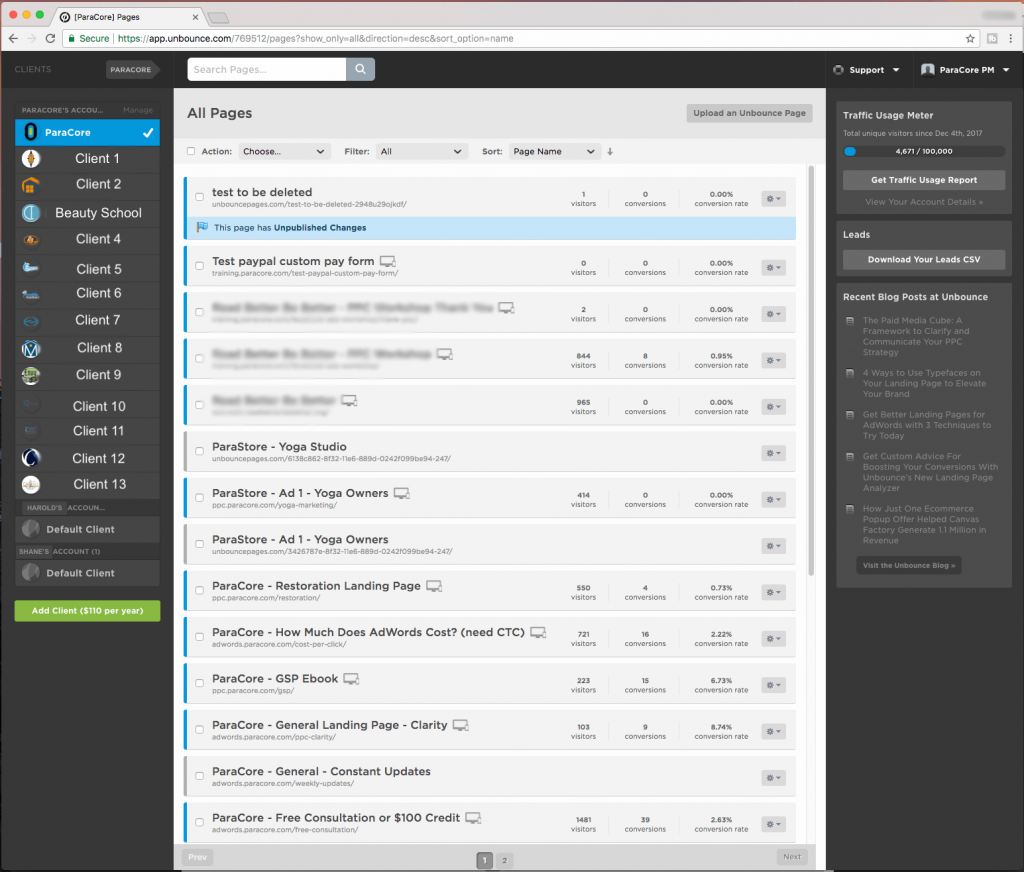
As your virtual concierge, it’s my duty to give you the proper tour of Unbounce, but first, let’s start with client management. There are two ways to manage clients in Unbounce. One is with your own Unbounce account, and the other is by connecting to client accounts. If you’re using your account, you have sub-accounts for each client which are controlled by your agency. If a client has their own account, theirs can be seen in your list of sub-accounts once they give you access, but the client has full ownership. They’re essentially sharing access to the account with you through Unbounce.
In this example, my company’s account is highlighted at the top, meaning it’s selected, and you can see all of the landing pages I’ve currently got running for my company, including their stats. This is your page dashboard once you login. Underneath my company account, on the left, you’ll see a selection of sub-accounts used for our clients. This is the scenario where my agency controls the sub-account for clients, versus the client owning the account.
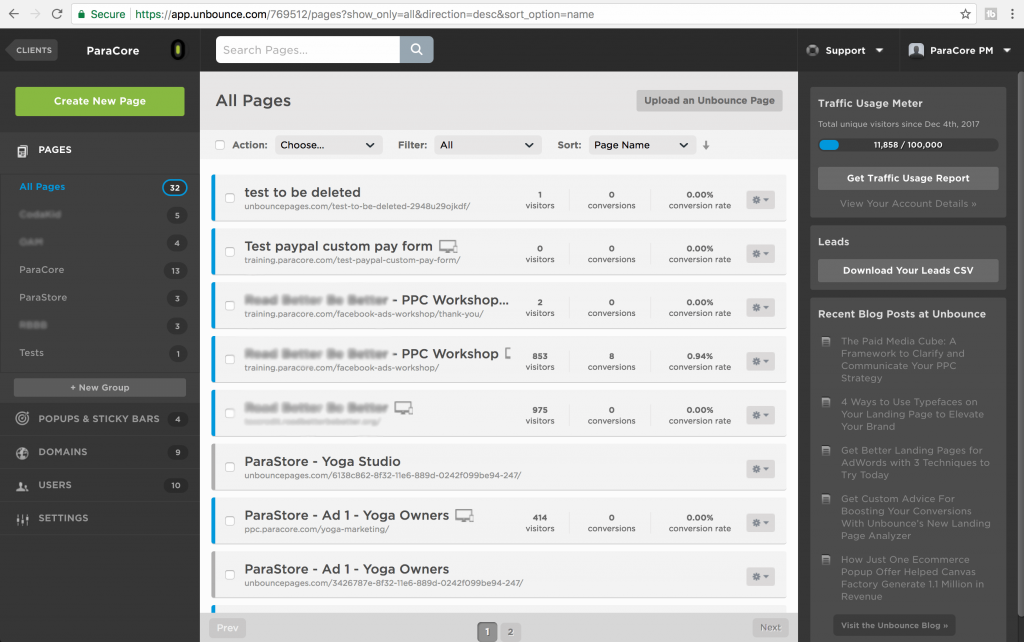
When I click on one of my client sub-accounts, I can see all of the landing pages currently being built, or already launched, for that client. Each client sub-account behaves like its own individual account with pages, convertibles, domains, etc. If you remember when we talked about pricing, the number of client sub-accounts that you have will determine which tier you fall into. When I use my own account to create client sub-accounts they show-up here, which is our agency view.
However, your client may choose to share their own Unbounce account with your agency via user invite. In that scenario, the client’s account shows up on the bottom of your sub-account list under a heading with the client’s name. For example, “Harold’s Account.” In rare cases, when the client wants full control, they may just have you login to their account. That’s pretty unusual and is probably a red flag if they won’t even give you your own user access.
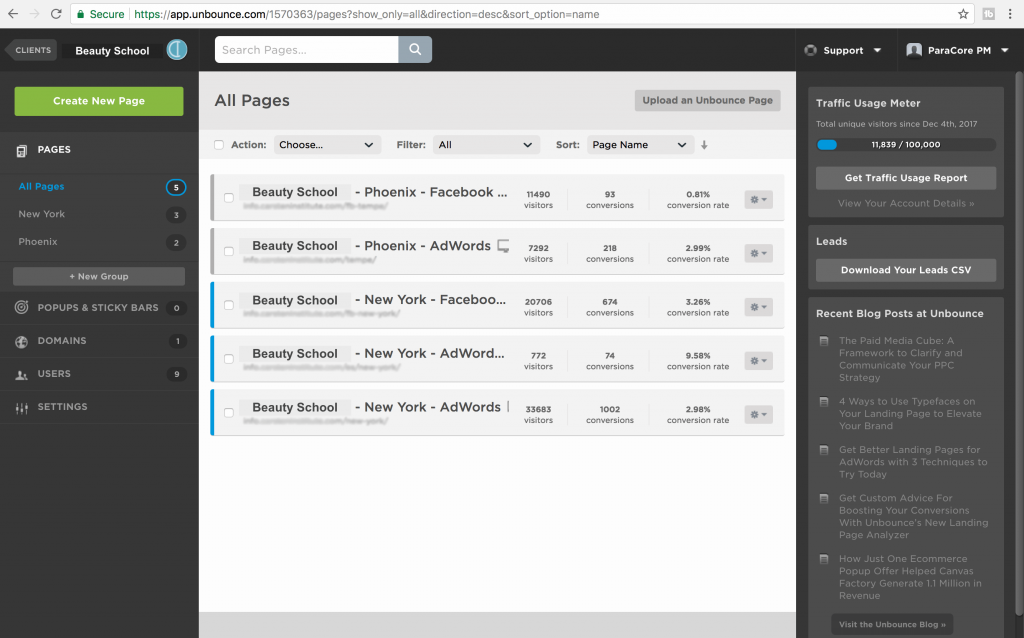
This is an example of an account without client sub-accounts. In this scenario, the client gave us access to their account with their login info. This type of account won’t have sub-accounts under the main list. Also, when dealing with direct client logins, you’ll likely experience limitations because they’re typically on an “Essential” account plan. For this reason, I prefer to work on client accounts directly under my plan. That way I’m able to provide them with the most advantageous results for their landing pages.
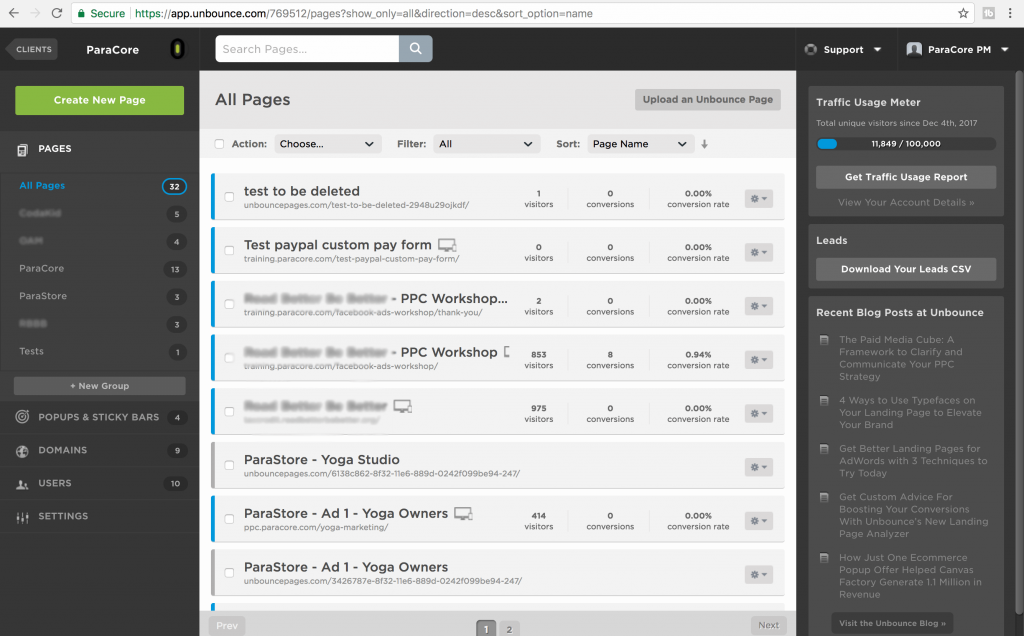
The pages list at the left-hand side of the account dashboard allows you to create groups to more easily organize your pages. You can group your landing pages by product, brand, purpose, launch status, or whatever you want. It’s a great way to organize an account if you have a high volume of landing pages. The Traffic Usage Meter on the right-hand side lets you know how close you are to reaching your monthly traffic limit depending on your plan. At the time of this recording I’m on an older plan where the limit is 100,000 unique visitors; however, all 3 current plans offer a 500,000-visitor monthly limit. This number represents all of my pages and client sub-account pages. However, it doesn’t include client accounts where I’ve simply been given access.
Before we dive into the other features on the client’s sub-account screen, I want you to take a look at something I overlooked for years… literally.
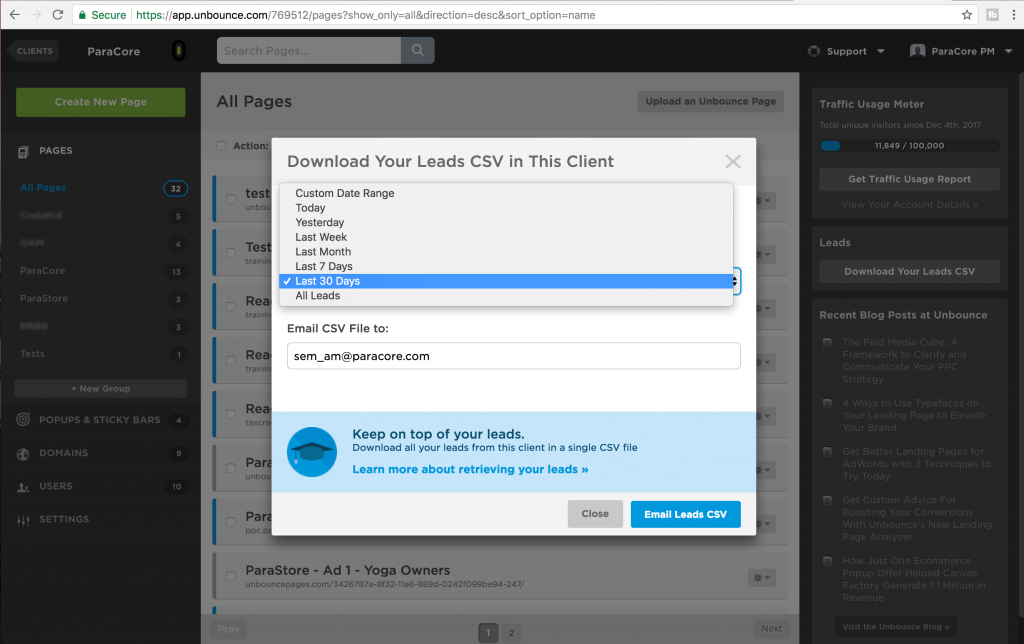
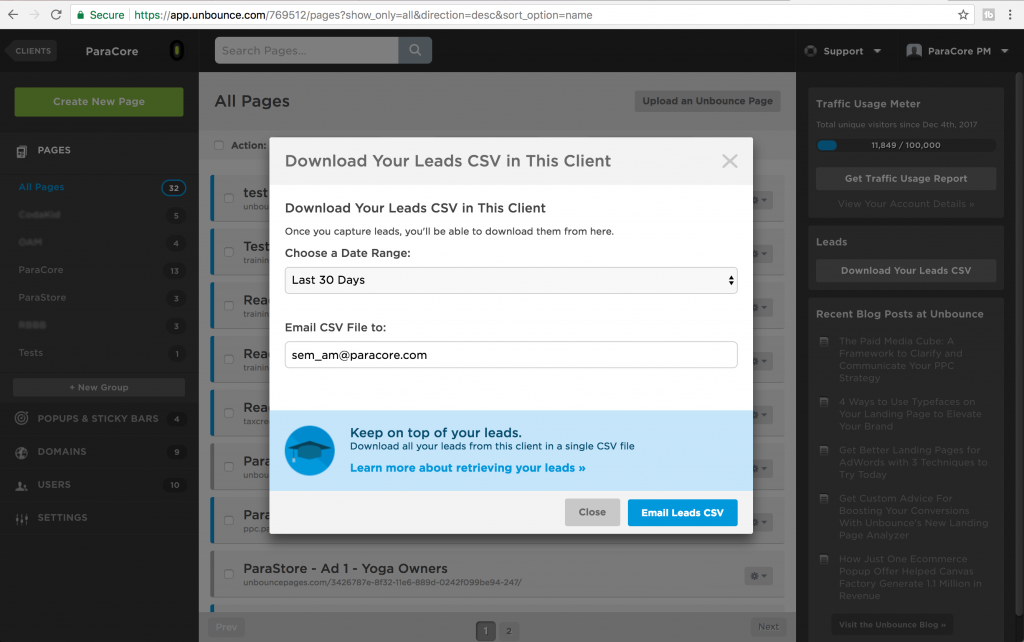
Under the “Traffic Usage Meter,” you’ll see an option to download your leads by client via CSV file.
If you need to download all of your client’s leads at one time, this is where you can do that. You can download your leads by page at the individual page level, but downloading all of them at once will save you a TON of time. You have options with this feature too! You can download or email the CSV file to yourself by day, week, month, custom range, or all leads. Keep this in mind when reporting time comes around. It’s a YUGE time saver.
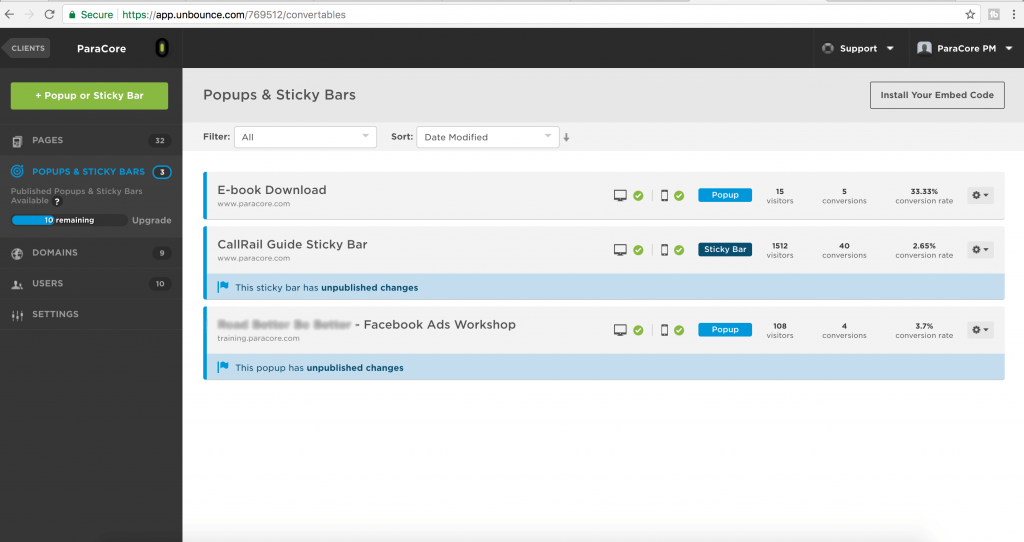
Alright, let’s check out the left sidebar navigation. When you click on the“Popups and Sticky Bars” link, you’re going to see this screen. Sticky Bars are horizontal bars that show up across the top or bottom of your page. An example of a popup, is a modal lightbox with room for images and call-to-action buttons that pop up over the top of your website content.
I have a total of three running at the time of this video with only 10 remaining. For my current plan, I have a total of 13 popups and sticky bars that I can have published at any given time for ALL of my accounts. This includes my client sub-accounts, but it does not include the client accounts that I manage as a “user.” As of the moment we’re filming this, you can have as many as 40 total published popups and sticky bars under the “Enterprise” plan.
I’ll delve deeper into these features in Video 8 where we’ll talk about what popups and sticky bars do and ways in which you can use them to get more leads, sign-ups, sales, or whatever your marketing goal is.
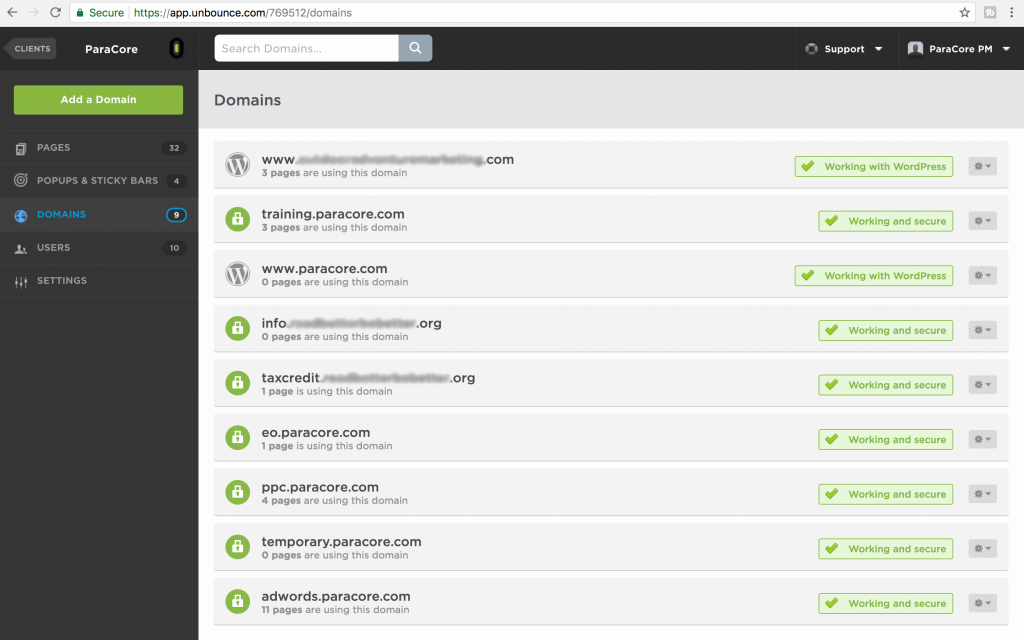
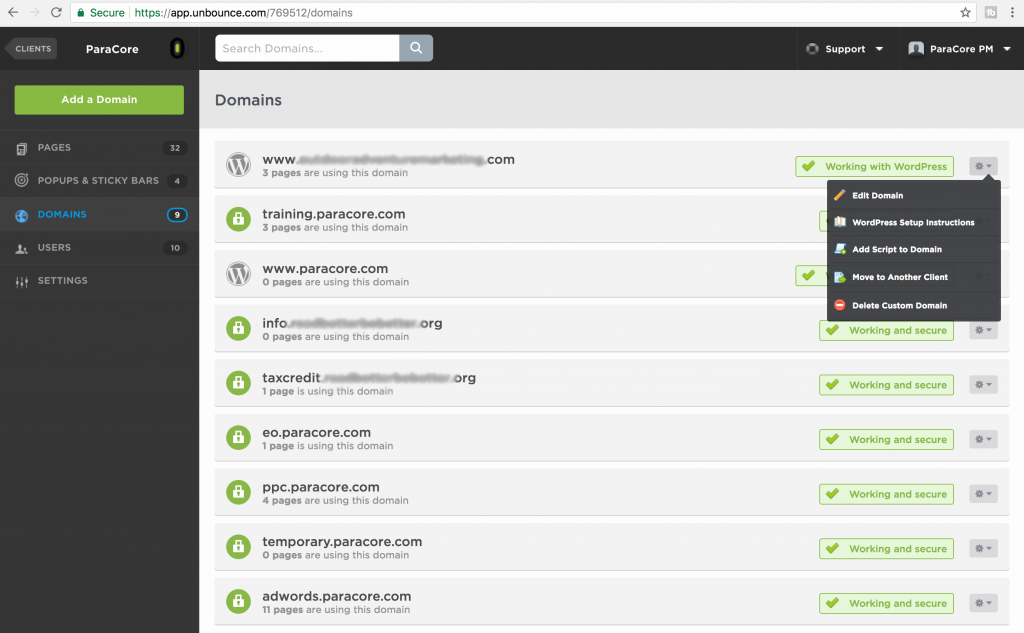
When you click on the “Domains” link, you’ll see all of the domains that you have, including those working with integrations like WordPress. This is where you’ll take care of your domain management. From this screen, you can add, edit, and move domains to another client all from the dropdown menu. You can also create or delete custom domains. This includes adding as many pages to each domain, as you’d like.
Adding a script to a domain happens in the “Settings” link where the script manager is located, which we’ll get to in a minute.
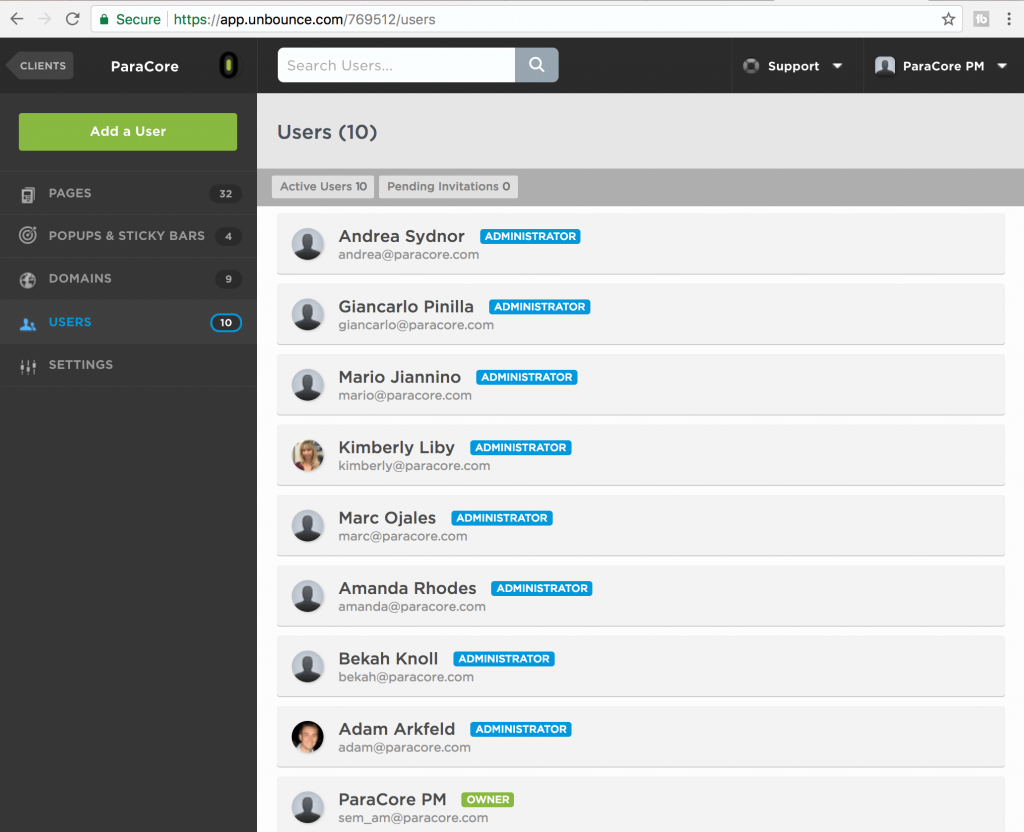
When you click on the “Users” link, you’ll see that this is where you can give employees, clients, or users access to your account. View current users and their role, invite other users to be the administrator of a client’s account, and the like. You can specify the user’s level of interaction by choosing “view-only,” as well. If an invitation is still pending, typically you’ll see that here and have the option to resend that invitation.
As a head’s up, however, to remove user access or grant admin access to “view-only” users, you’ll have to visit “manage account” to manage your users. Administrative roles are automatic in the “Users” link and cannot be changed from this screen.
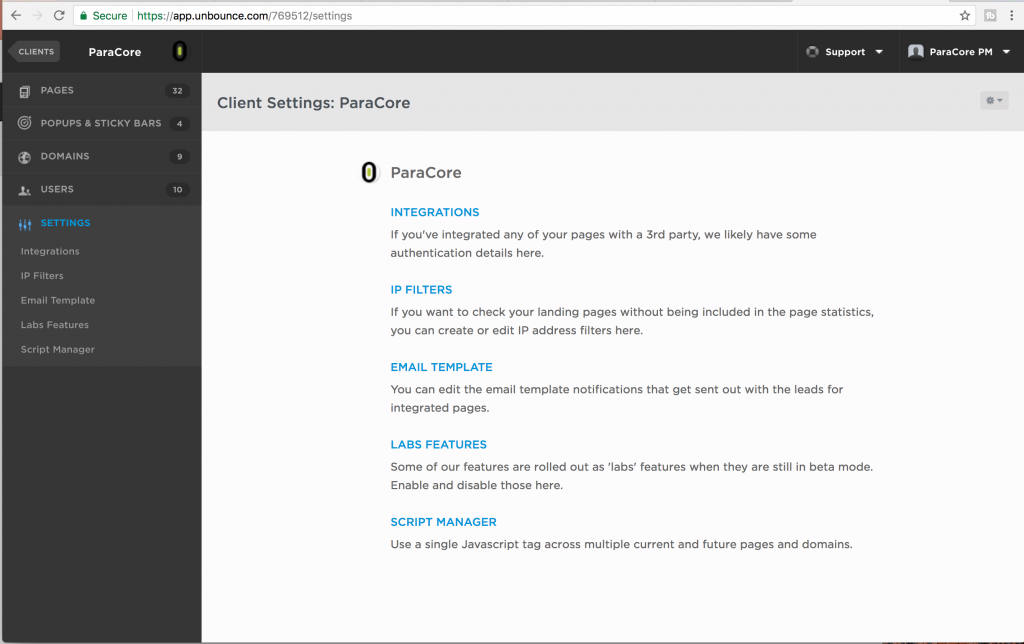
The last featured section here is the “Settings” section.
These page settings and options are covered more thoroughly in Video 5, but for navigational purposes, this is where you can find them. This includes setting up your integrations, checking your IP filters, creating an email template or editing the one you’re using, enabling or disabling labs, and managing or creating scripts in the script manager, as I mentioned earlier. For example, adding a tracking script.
That concludes our virtual tour of Unbounce, and we’re going to get even more hands on in the next video where I’ll do a screencast showing you how to build a successful landing page in Unbounce. If you enjoyed the tour, click that like button below and click the red subscribe button to be notified the secondI release a new video. If you have any questions or need some direction, I’m your man, just leave a question or comment below and I’ll see you in the next video!
Related Posts
- How To Create an Effective Landing Page for Facebook Ads
- WordPress vs Unbounce: What’s Best for Landing Pages?
- How Quizzes Can Boost Your Landing Page Conversion Rate
- Bonus Interview Part II with Ryan Engley!
- Bonus Interview Part I with Ryan Engley!
- Additional Tools Available in Unbounce that Make Your Landing Pages Awesome
- Using Popups and Sticky Bars in Unbounce to Convert Visitors into Customers
- Setting Up and Using A/B Testing for Your Landing Pages in Unbounce
- Unbounce Page Settings: Beneficial Features Explained
- Managing Your Landing Pages in Unbounce
- An Unbounce Screencast on Building Landing Pages for Your PPC Marketing
- Unbounce the Go-to Landing Page Builder
- The RIDICULOUSLY Simple Guide to Using Unbounce for Your PPC Marketing
- Overview of Unbounce Landing Pages
Want In-Depth PPC Training?
Visit the ParaCore AcademyCurious how we can improve your campaigns?
Schedule some time to chat with our team so we can learn more about you and your business.
