Want In-Depth PPC Training?
Visit the ParaCore Academy
Are you using Unbounce to build a landing page, but don’t know how to connect your landing page to the rest of your marketing ecosystem?
Today I’m going to show you how!
If you want to skip ahead to a specific section in the video, check out the description below. I’ve included an outline with time-stamped links.
Timestamps:
[0:02] – Intro
[0:52] – Domains
[2:00] – Unbounce step-by-step
[2:25] – WordPress Plugin
[2:50] – Sub-Domain
[3:10] – Creating Page Groups
[4:51] – CRM management
[5:53] – What’s next
So, you’ve finished building your landing page and you want to make sure the landing page fits your overall brand, right?
To do this, you’ll have to make sure your landing page looks like it’s part of your main website. And to do that, you’ll want to connect your landing page to your domain name.
There are a couple of ways to connect your domain to your landing page.
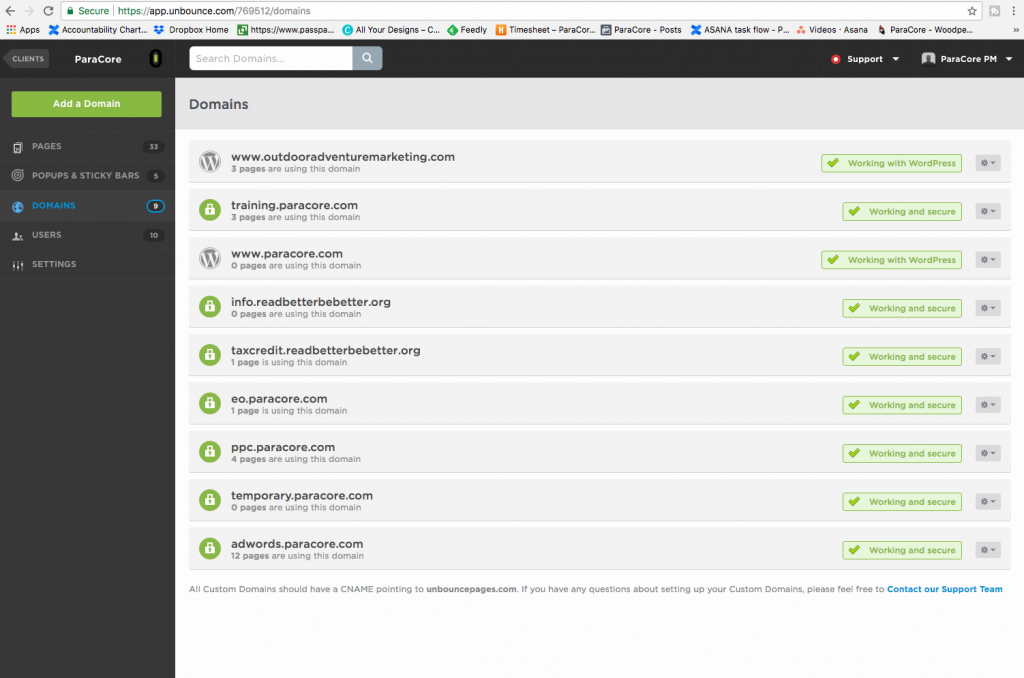
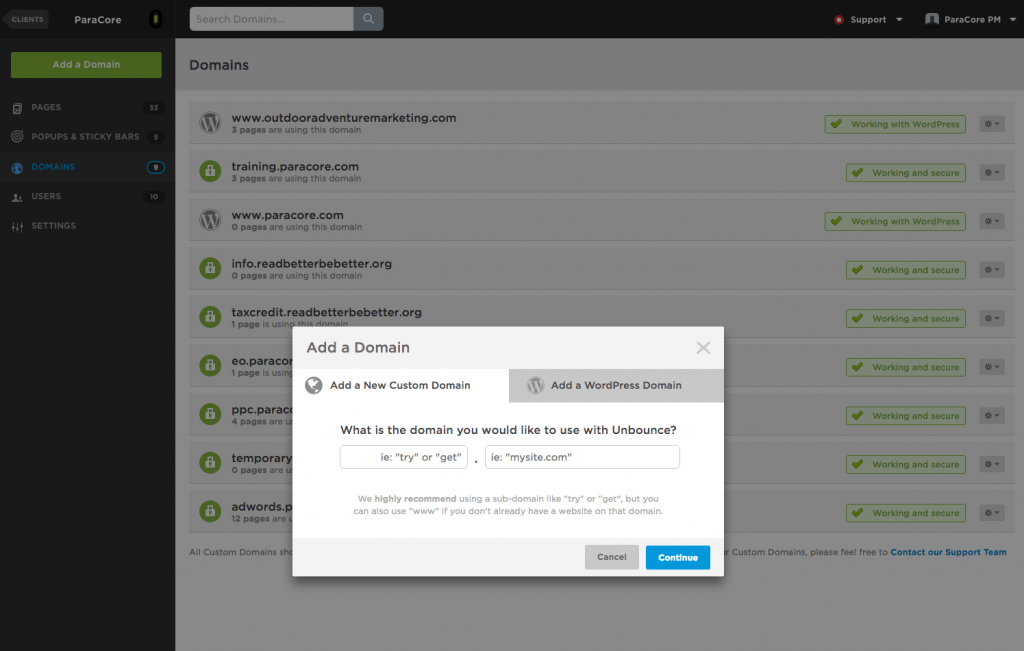
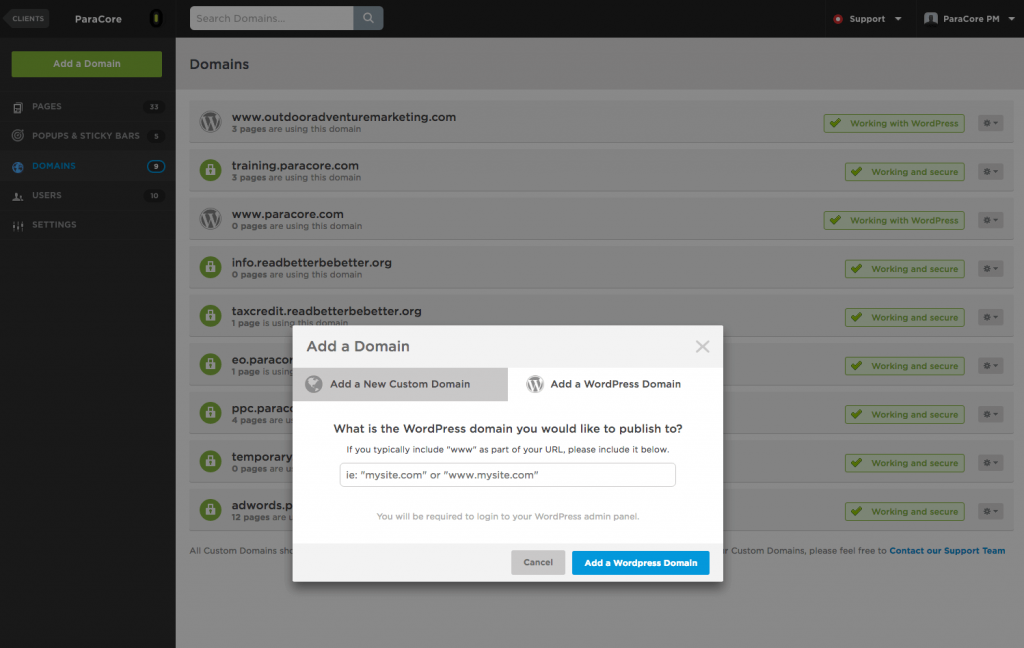
You can add a new custom domain, which requires updating DNS records, or if your site is using WordPress, install a plugin available from Unbounce.
When using a custom domain, your pages will either use your root domain or a subdomain.
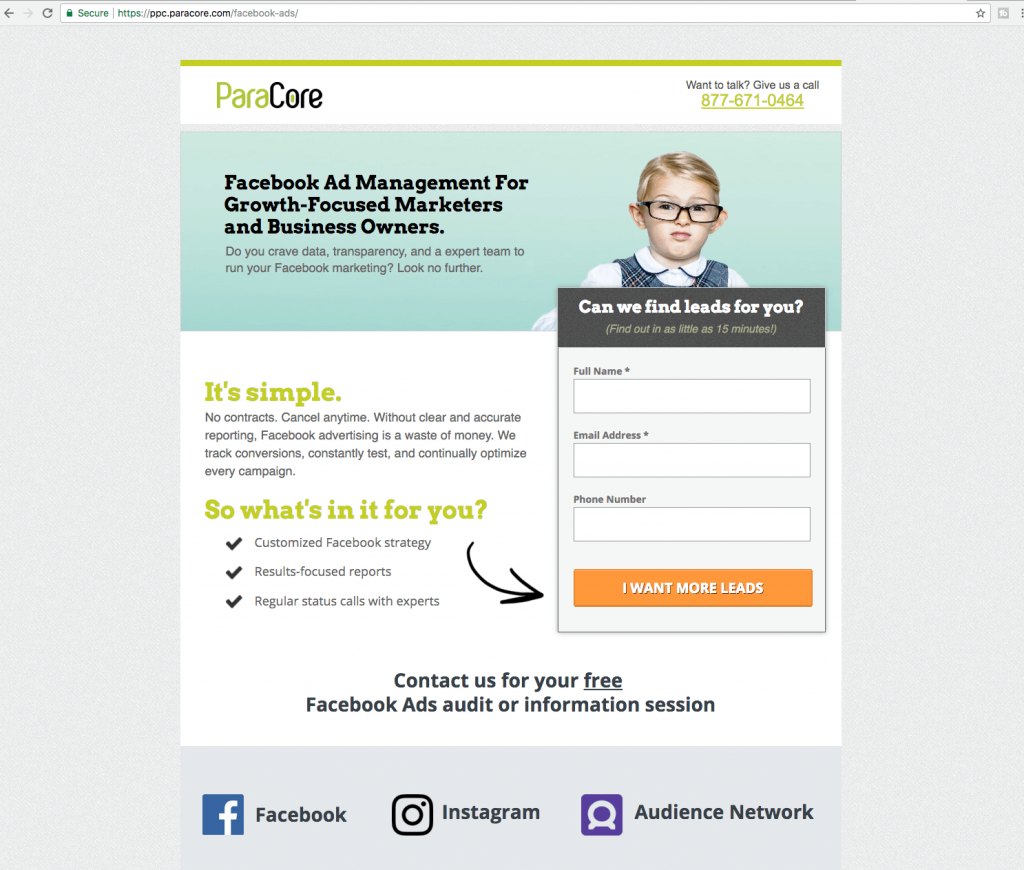
A root domain is a domain that has the www before the domain name like www.paracore.com. You’d want to do this if you don’t have a full website and you’re using the domain just for lead generation efforts or a minimal website.
If you want to use your root domain in Unbounce AND you have a full-blown website, you can use the WordPress plugin that I’ll touch on in a minute.
Alternatively, you can create a subdomain like try.paracore.com. The sub-domain piece is the part that replaces the “www,” so in this case try. Domains are set up using a CNAME with your domain name registrar like GoDaddy, NameCheap, or one of the hundreds of others.
Unbounce has an extensive step-by-step tutorial available on their website for setting up your CNAME record. They go over adding your domain name to your Unbounce account and then applying that domain to your landing pages.
If you’re concerned about security, Unbounce has all its custom domains automatically secured with SSL. This means that your form submissions will be encrypted to keep the creepers from creeping on your sensitive data.
If your site is built on WordPress, the easiest way to connect your Unbounce pages to your domain is using the WordPress plugin. You simply install the Unbounce plugin found in WordPress’s plugin repository as you would any other plugin. This makes your landing page appear on your root domain and website without a new subdomain.
So, if you have a full-blown website built on WordPress, you can leverage the WordPress platform to add landing pages to your site that you’re using for marketing. If you’re not using WordPress, you’ll most likely need to use a subdomain.
Once your domain is set up, you can change the page name that appears in the URL.
For example, changing www.paracore.com/free-offer, to www.paracore.com/act-now.
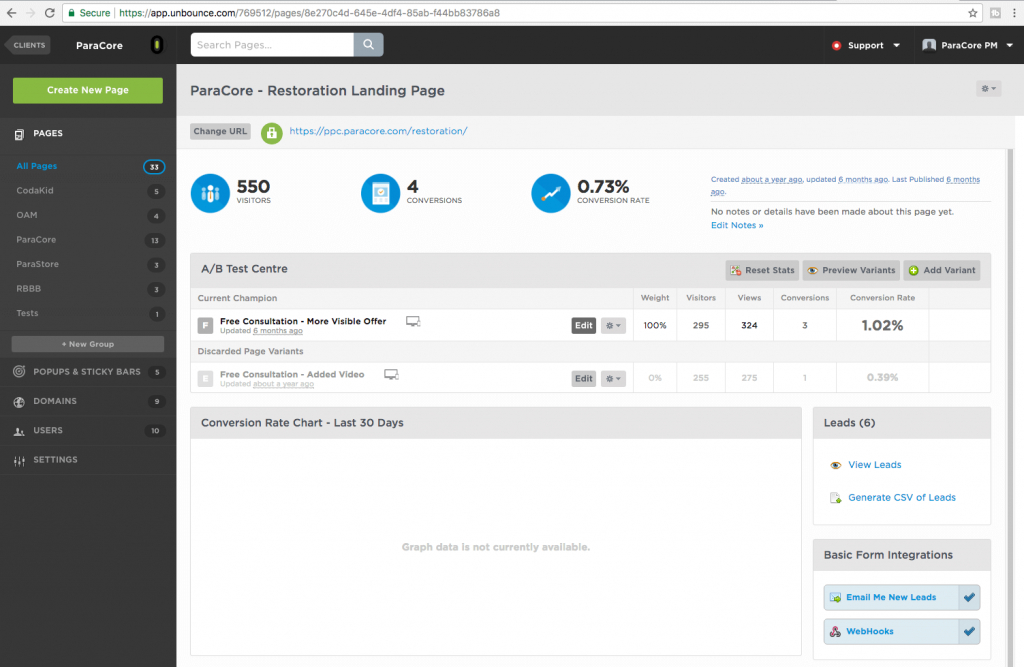
When you click on the “Change URL” button, you’re prompted to choose a new URL for your page, and the change is instant.
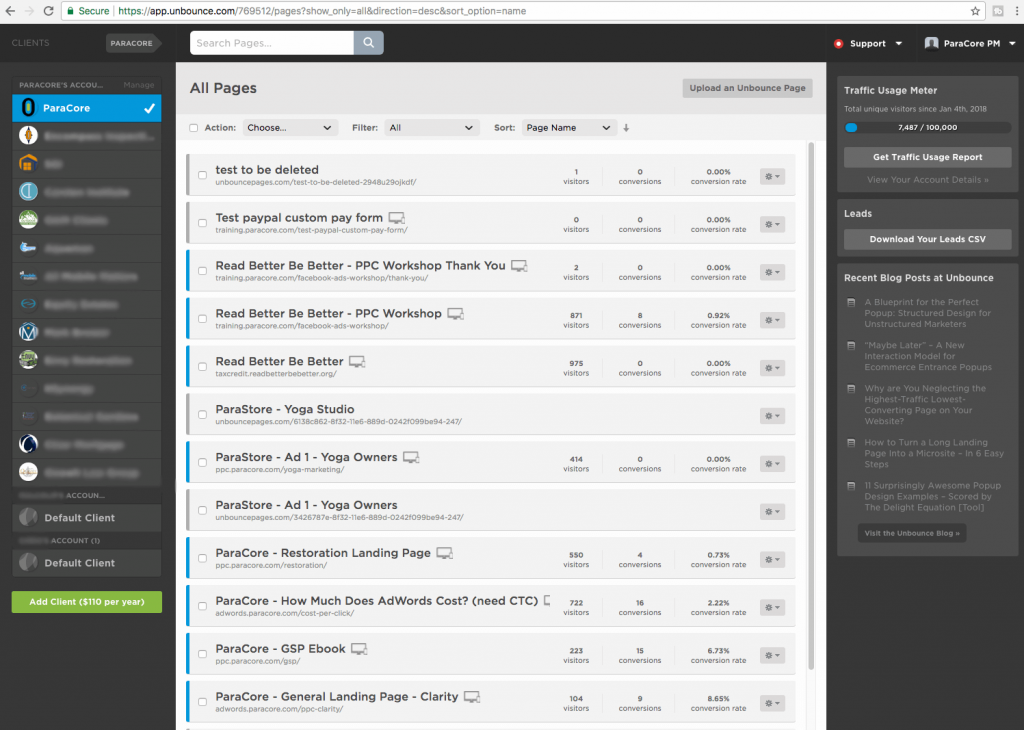
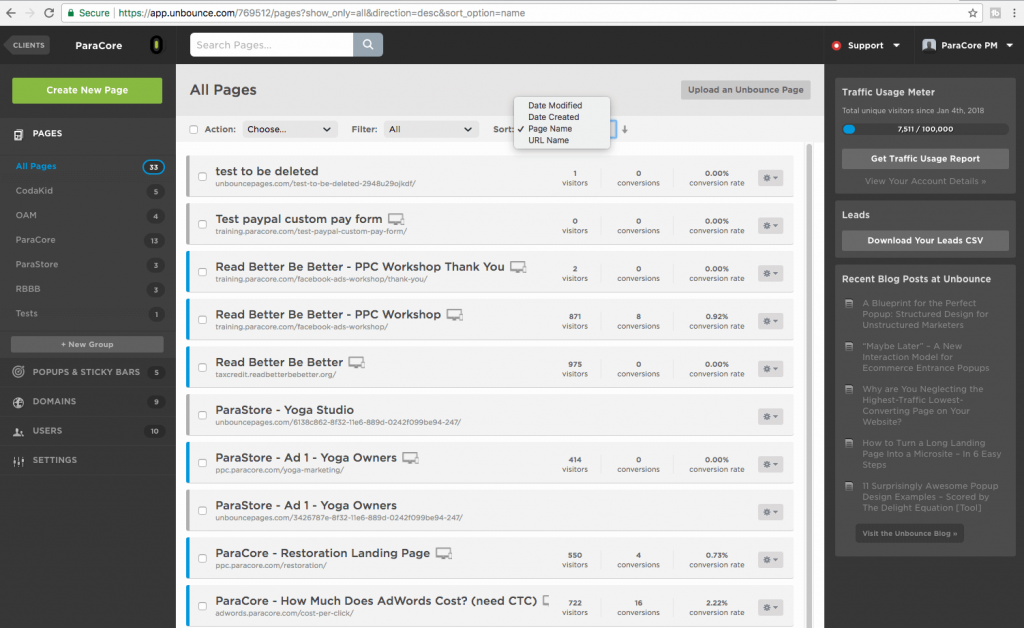
After you start launching your landing pages, you’ll want to keep your pages organized using groups as you add more.
Groups are exactly as they sound, a feature that allows you to organize a large number of pages into logical groupings so you can find them faster.
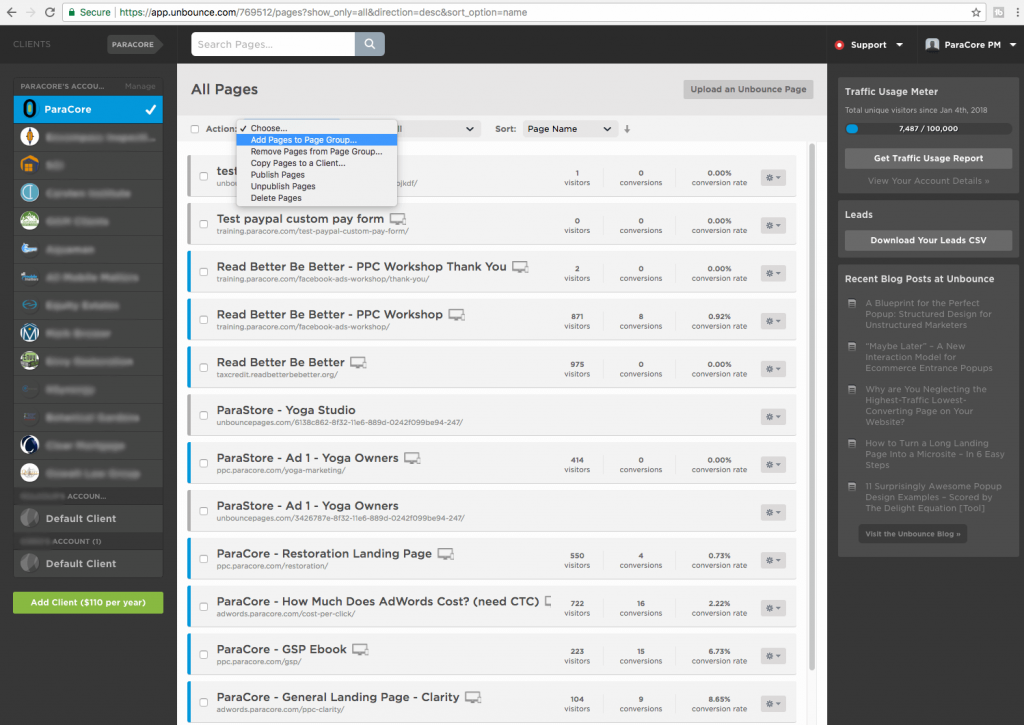
Maybe you have several landing pages that you want to group by service category or product brand. You can add and remove pages to and from a page group by simply selecting the pages and choosing what group they should be within.
If you find yourself using similar page designs for many clients, you can duplicate pages for use in other client sub-accounts. For example, if a landing page is doing well with one client, and you think that same page would do well with another client, simply copy the page to that client to make a duplicate, and make the necessary adjustments from there.
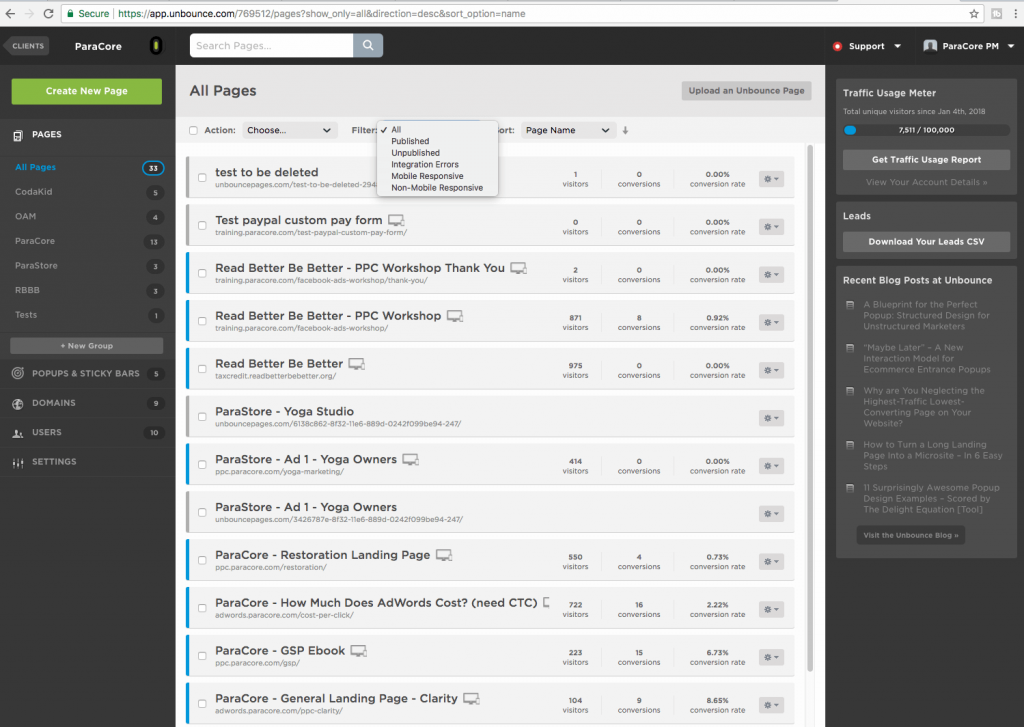
If you have a ton of pages to sift through, the filter and sort fields provide several organizational options to see pages by different statuses.
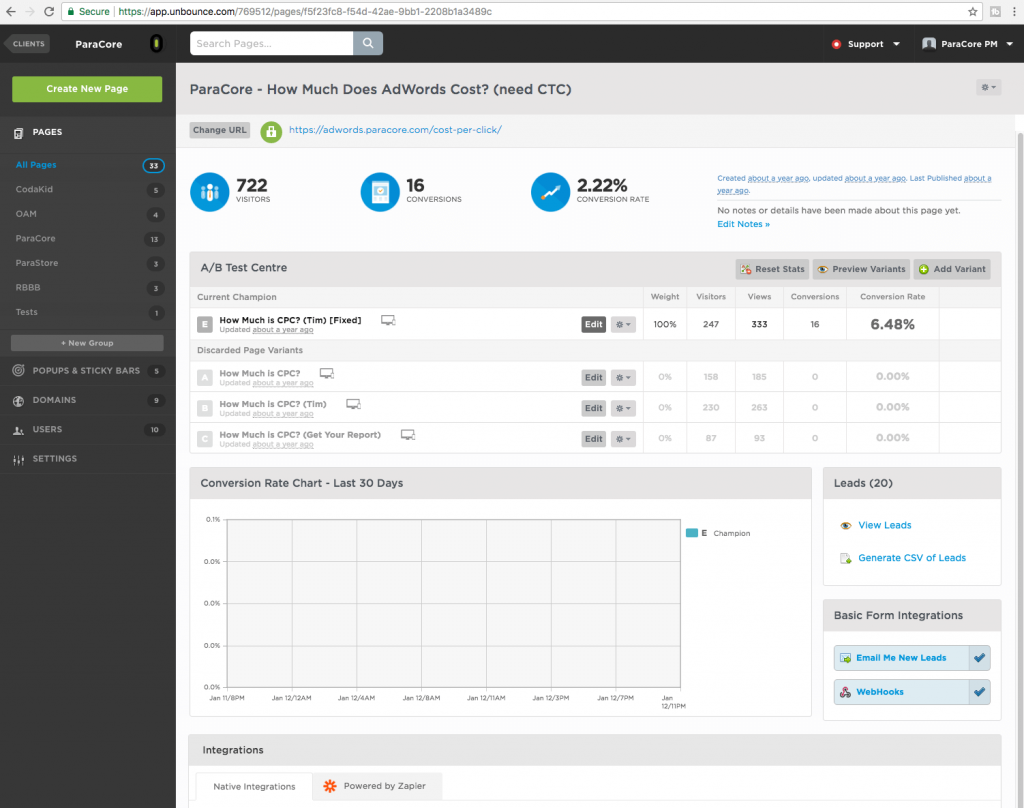
When you click on one of your pages, you’ll see the page overview screen. This is where you initiate A/B testing of your different page variants.
You’ll see a snapshot of the page stats including visitors, views, conversions, conversion rates, and a chart to view all of your page variant conversion rates side-by-side. Video 7 is dedicated to A/B testing, so we’ll cover how you test and analyze page variants in that upcoming video.
In a previous video, we touched on viewing leads by the client’s entire sub-account, but you can also download leads within each individual page.
You can view the leads within the Unbounce interface or download the leads in a CSV file. You also have the option to download all leads from the page or select the desired timeframe.
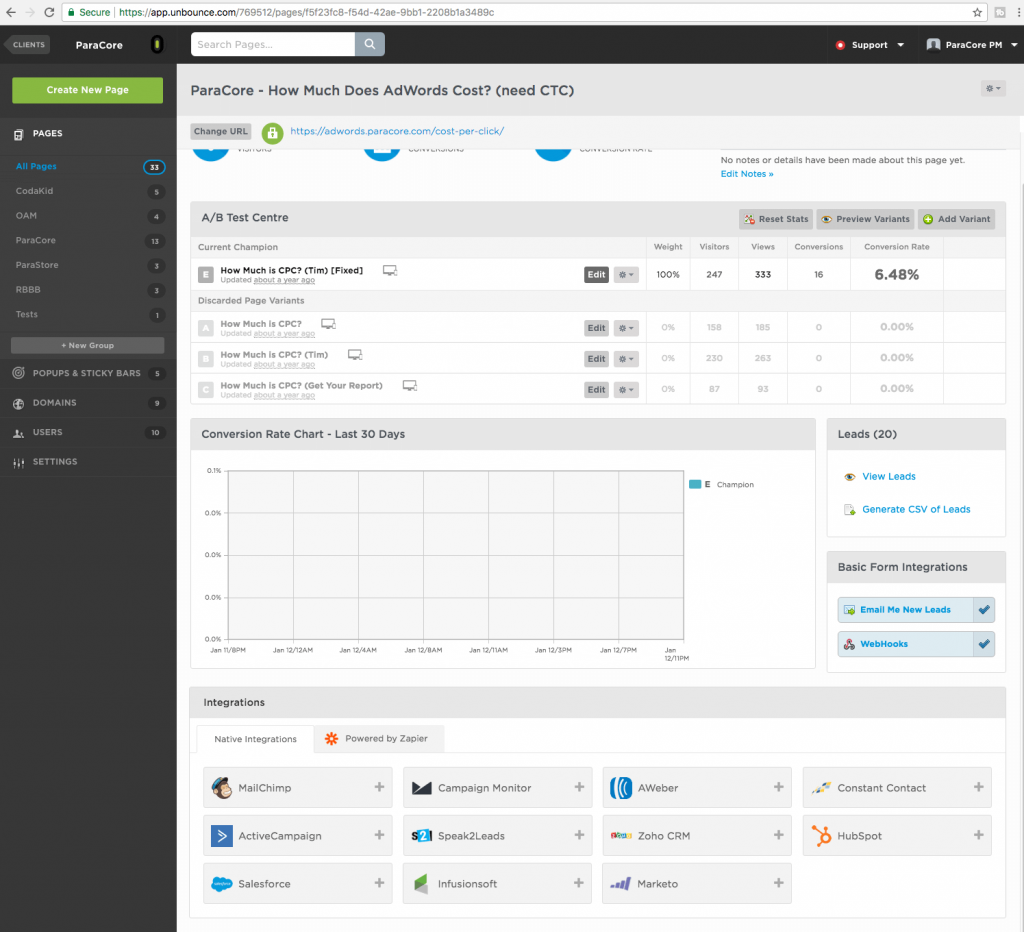
Most lead activity is extremely time-sensitive and you want to respond as soon as possible. When form submissions are completed, you can have new leads emailed to you as soon as they come in. You can have one or multiple email addresses receive the notification and change the subject line of the email to make sure it grabs everyone’s attention.
If you have a CRM or custom system that can accept POST data through a specified URL, you can set up a webhook to have the lead data sent to any URL that you choose. The form submission webhook sends a push notification to the recipient when someone submits a form on one of your Unbounce pages. The most common use for a webhook in PPC marketing is to feed leads into your CRM.
Sometimes, Webhooks can be complicated and they used to be the only method of integration with Zapier to feed your leads into other systems.
However, Zapier has recently been added to the Unbounce interface to more easily connect your leads with different CRMs and online platforms.
As an FYI, some integrations are only available with the Premium and Enterprise Zapier plans, so you might need to upgrade that account. Unbounce also has a few native integrations that don’t use Zapier to integrate with platforms like Salesforce, Zoho, HubSpot, and a few more.
At this time, the native Zapier integration has about 60 zaps that can be managed from within Unbounce. If your desired CRM or third-party platform isn’t listed but supports Zapier, you’ll have to set up a webhook and use Zapier’s interface to create the integration.
Got more questions? Reach out to us!
Related Posts
- How To Create an Effective Landing Page for Facebook Ads
- WordPress vs Unbounce: What’s Best for Landing Pages?
- How Quizzes Can Boost Your Landing Page Conversion Rate
- Bonus Interview Part II with Ryan Engley!
- Bonus Interview Part I with Ryan Engley!
- Additional Tools Available in Unbounce that Make Your Landing Pages Awesome
- Using Popups and Sticky Bars in Unbounce to Convert Visitors into Customers
- Setting Up and Using A/B Testing for Your Landing Pages in Unbounce
- Unbounce Page Settings: Beneficial Features Explained
- An Unbounce Screencast on Building Landing Pages for Your PPC Marketing
- Navigation and Features: Successful Landing Pages Using Unbounce
- Unbounce the Go-to Landing Page Builder
- The RIDICULOUSLY Simple Guide to Using Unbounce for Your PPC Marketing
- Overview of Unbounce Landing Pages
Want In-Depth PPC Training?
Visit the ParaCore AcademyCurious how we can improve your campaigns?
Schedule some time to chat with our team so we can learn more about you and your business.
