Want In-Depth PPC Training?
Visit the ParaCore AcademyTimestamps:
[0:47] – About this video
[1:09] – Call tagging
[2:34] – Keyword spotting
[4:30] – Automatic lead classification
[5:35] – Tracking after setup
Transcript:
By now in this series, you’ve already setup your CallRail account, phone numbers, website integrations, and notifications. You’re are up and running with your call tracking. Today, we’re going to really get to play around with CallRail’s features and delve a little deeper into making the system work for you by using call scoring and call tagging features to measure your results.
I’m Adam Arkfeld, owner of ParaCore, a pay per click lead generation agency. This is the sixth video of ten in my Ultimate Guide to Using CallRail. It’s a comprehensive video series for using CallRail, a third-party call tracking system with your pay per click marketing. Once you’re done with the series, you’ll be a call tracking AND CallRail guru. If ever you want to jump to a specific section of the video, we’ve included timestamps in the description below. You can always watch previous videos as a refresher or skip ahead to other videos if I’m covering a topic you’re familiar with.
In this video, we’re going to cover call tagging and automatic lead classification. One is a manual method to report on leads and the other is automated within CallRail. We’ll also go over some other manual and automated methods of tagging and classification, so let’s get started.
Everything I’m going to cover in this video is listed under the “settings” section of CallRail, so if you ever forget where you were, go back to settings and you’ll be able to find your way. First up is call tagging. The “Call Tags” tool under settings allows you to categorize calls into different buckets. The purpose of call tagging is to eventually analyze your data. As an example, let’s say you get one hundred calls coming in through AdWords, each month. And now you need to know if they’re qualified or unqualified leads. Since call tagging is a manual method, you would listen to each call, then tag it as a “qualified lead,” or an “unqualified lead.” You’re essentially labeling the phone call. Conceptually, that’s how it works. But, before you can actually tag a call, you have to create and edit your call tag list to match the tags you want to use (Figure 6.1 below).
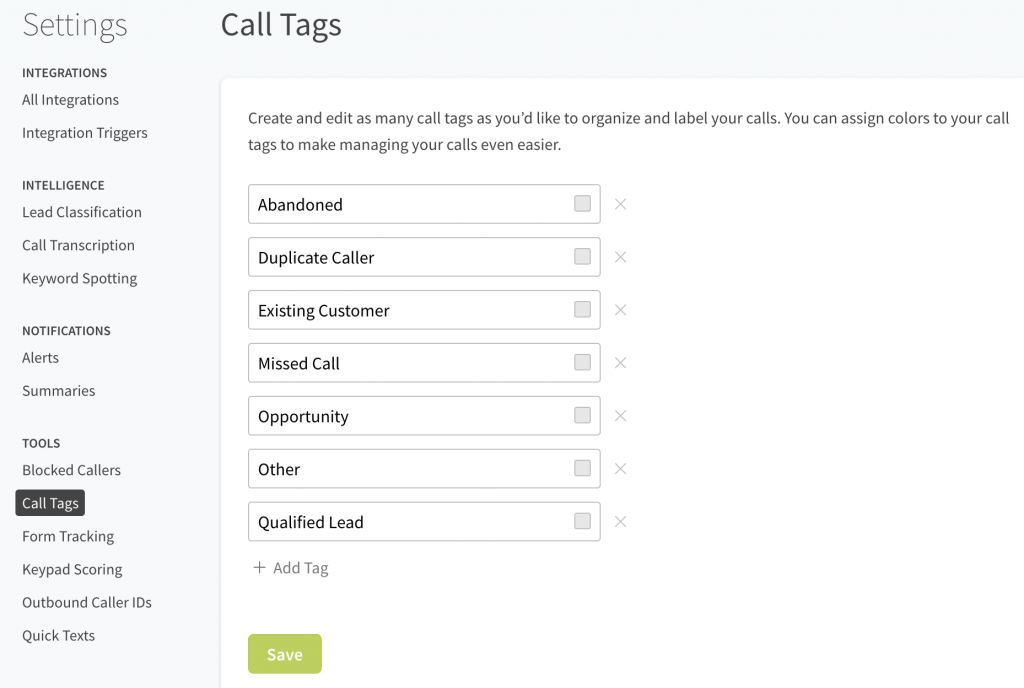 (Figure 6.1: Create your call tags.)
In order to do that, you click on the “add tag” plus sign and start creating as many tags or “labels” as you think you’ll need for every type of call (Figure 6.2 below).
[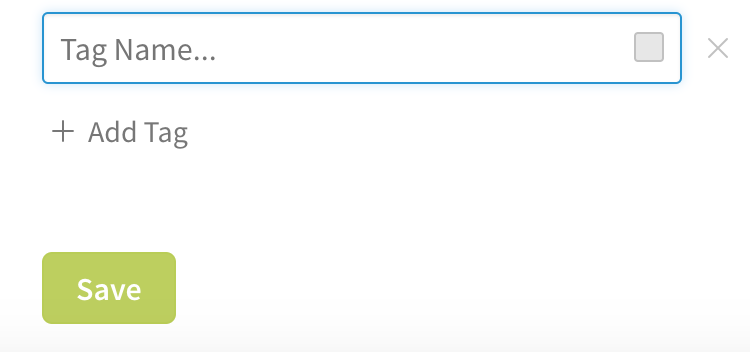 (Figure 6.2: Click “Add Tag,” type it in and “Save.”)
You can always add more later as you receive various call types and want to track different metrics. For example, you can create a tag called “qualified lead,” “unqualified lead,” “abandoned call,” “duplicate call,” “existing customer,” and so on. You can also tag a call as a “wrong number” and if you like to get real fancy, you can color-code them too (Figures 6.3 and 6.4 below).
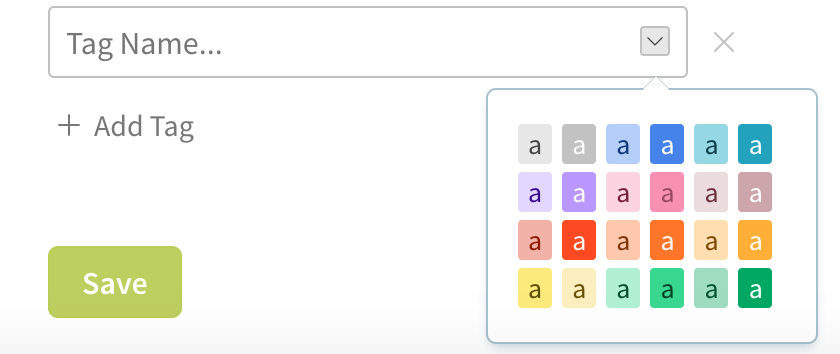 (Figure 6.3: You can color code your tags.)
 (Figure 6.4: Here’s an example of a color-coded tag.)
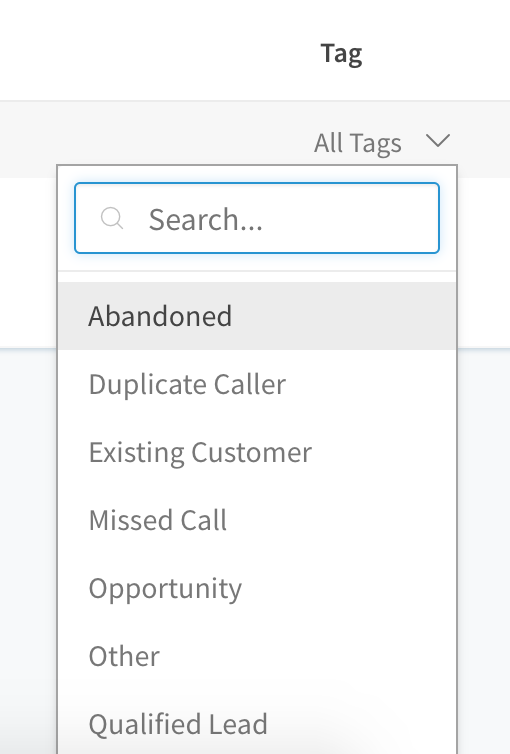
At ParaCore, we only use a very limited number of tags consistently across all campaigns. We use Qualified Lead, which in CallRail is an Opportunity by default, Missed Call, Abandoned Call, Duplicate Caller, Other, and then will add custom tags only if we need to. We have a very strict adherence to only using these tags and that creates consistency across all the different campaigns we manage.
Call tagging provides a lot of flexibility for different types of tracking and reporting. Just make sure you organize your tags before you get started and your reports will be easy to generate with informative insights.
Next, we’re going to touch on “Keyword Spotting,” which is an automated method of tagging. In order to use keyword spotting, you have to turn on your “Call Transcription” feature and specify which numbers and sources you’d like transcribed. When you click the Call Transcription toggle to turn on your call transcription feature, your Transcription Criteria menu will automatically show (Figures 6.5 and 6.6 below).
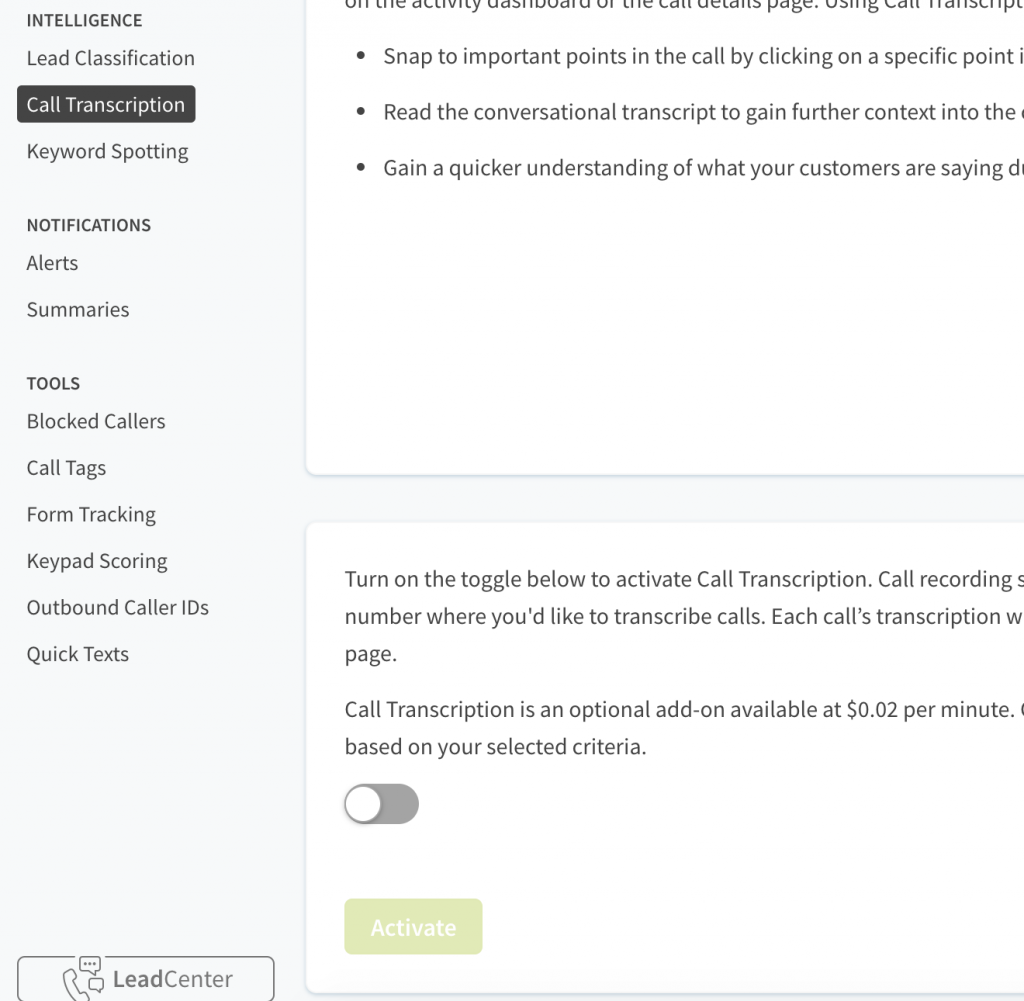 (Figure 6.5: Click the toggle to slide it to the right.)
 (Figure 6.6: Click “Activate” to get started.)
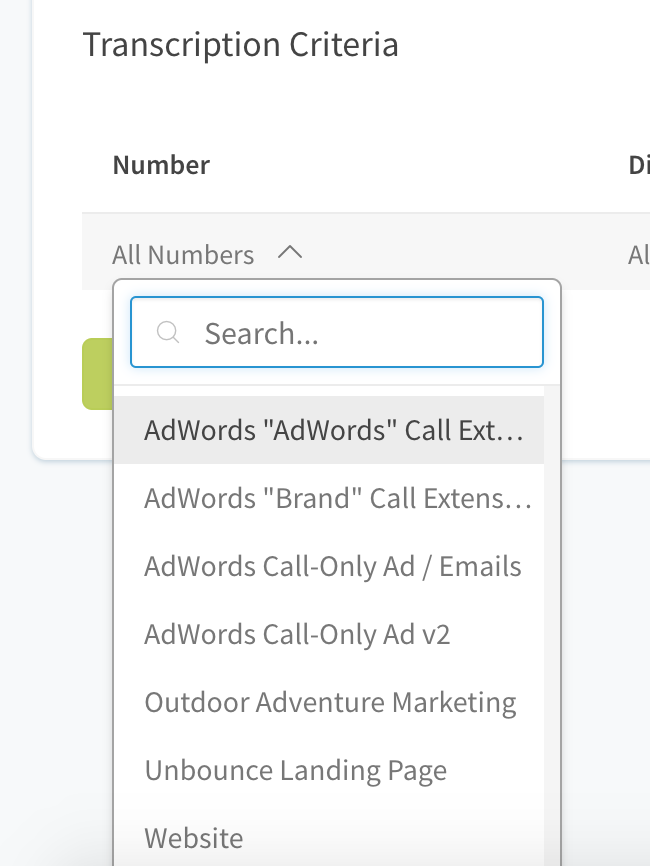
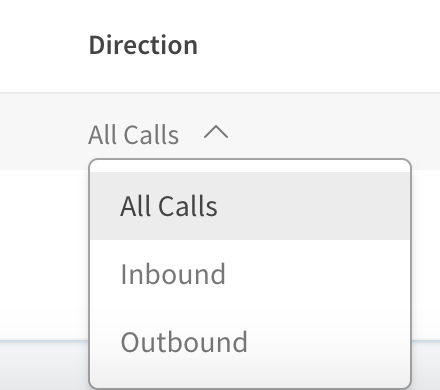
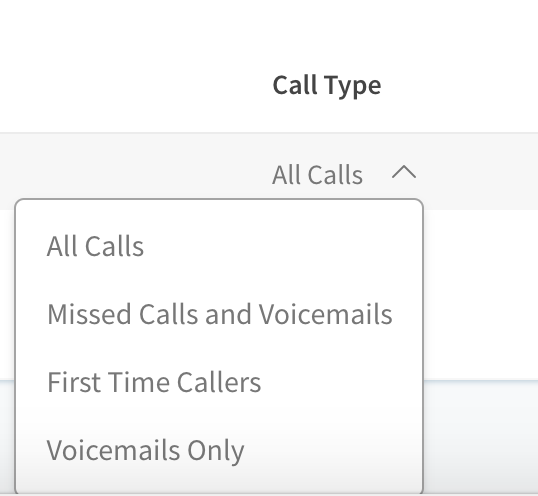
This is how you’ll set the parameters. Choose your number, direction, call type, minimum duration, and tag from the respective pop down menus (Figures 6.7, 6.8, 6.9, 6.10, and 6.11 below).
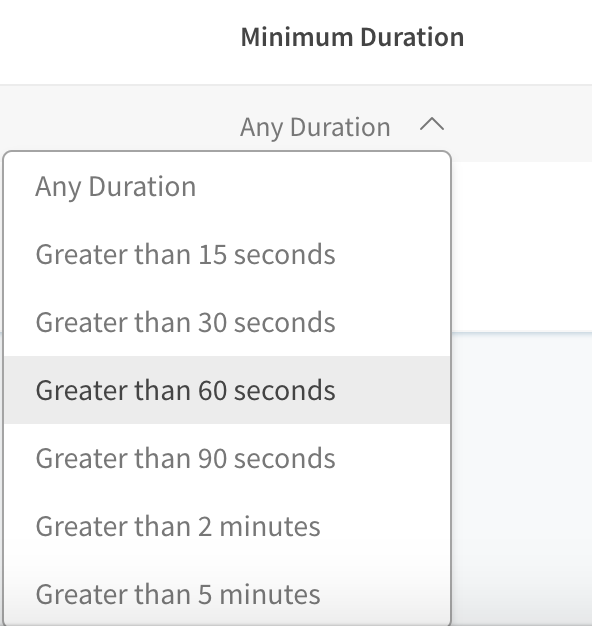 (Figure 6.10: Minimum Duration.)
Then click the “Activate” button and you’ve got transcription. It’s worth noting that this feature is an optional add-on for an additional two cents per minute; however, it’s beneficial and required for employee keyword spotting.
Now that you’ve turned on call transcription and call recording is already set up, let’s talk about “Keyword Spotting.” With keyword spotting you can create rules to tag or score your calls. The rules relate to the words used by the caller or agent during a call. It’s also a convenient feature that allows you to view the content of a call from the application on your phone without actually listening to it. To set-up keyword spotting, simply go to keyword spotting under the CallRail settings and fill out the IF/THEN parameters (Figure 6.12 below).
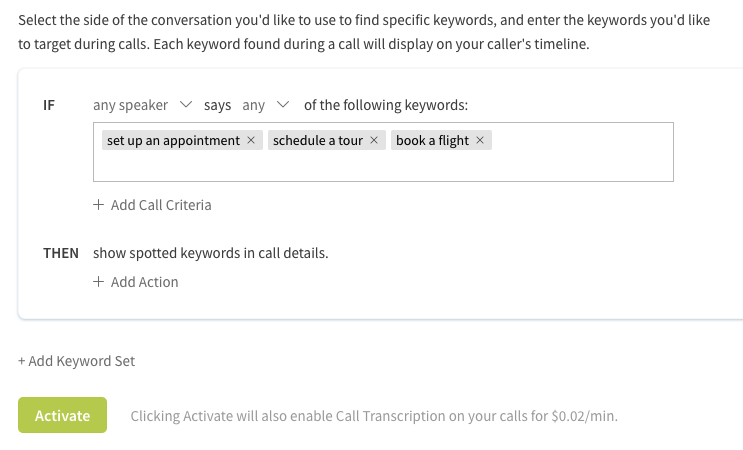 (Figure 6.12: This is what the IF/THEN parameters look like)
The IF section, specifies IF any customer or agent or speaker says any or all of the following keywords, THEN do this. So, you’ll want to list and specify as many keywords and keyword combinations as you think you’ll need (Figure 6.13 below).
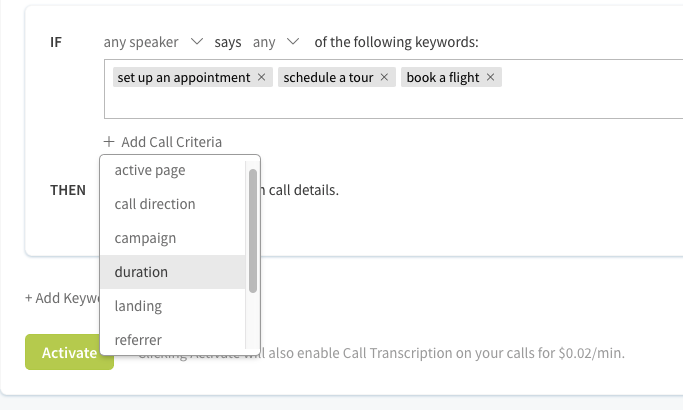 (Figure 6.13: Choose as many keywords as you think you’ll need.)
You can also add call criteria, such as call duration and specify those sub-parameters (Figure 6.14 below).
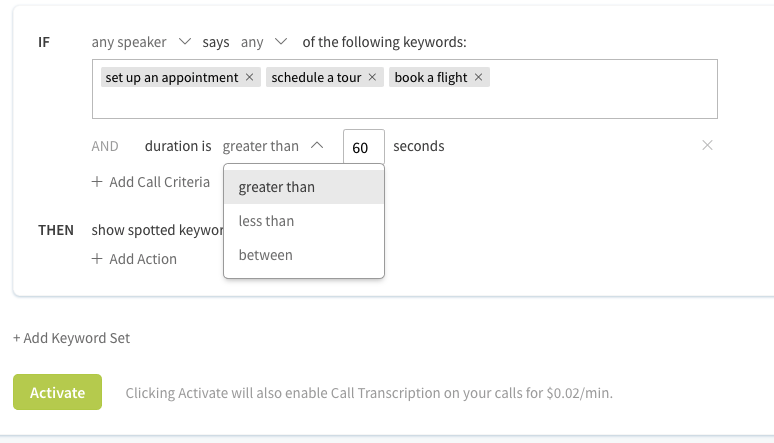 (Figure 6.14: You can specify the timeframe.)
For example: if a speaker says any of the following keywords AND the duration is greater than 60 seconds, do this.
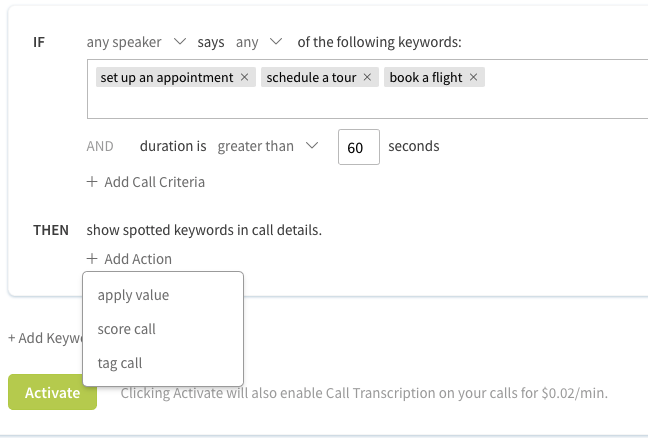 (Figure 6.15: Choose what happens when one of the keywords are used.)
You can add multiple layers of call criteria. After you’re done with the IF section, you’ll specify what to do with the call in the THEN section (Figure 6.15 above).
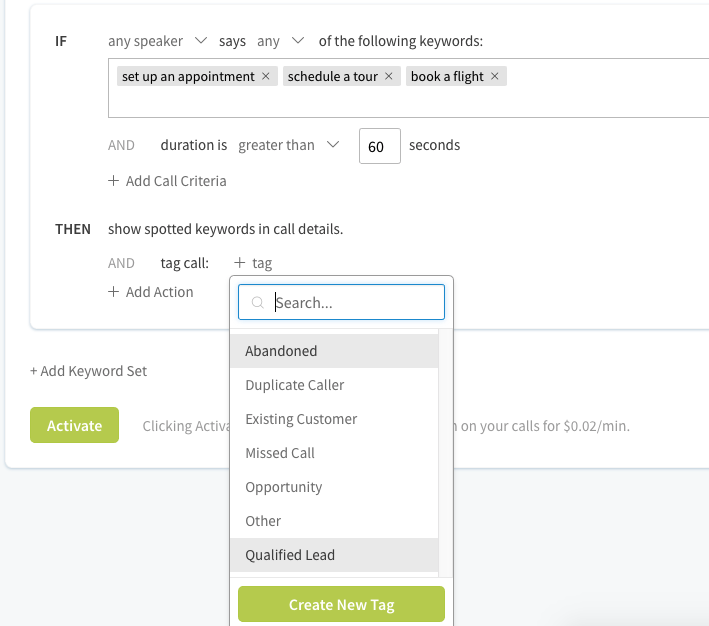 (Figure 6.16: Apply tags, etc.)
The THEN section is where you apply the tag, the call score and/or the action. You have several choices of tags, such as abandoned call or duplicate caller (Figure 6.16 above).
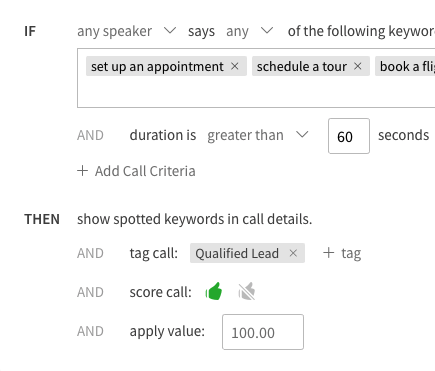 (Figure 6.17: Thumbs up, or no thumbs up (AKA: thumbs down).)
But with the call score you only have two. Thumbs up or thumbs down, which represents lead or not a lead (Figure 6.17 above). That’s all there is to keyword spotting unless you want to add another set, just click the activate button and the rules apply immediately.
If keyword spotting isn’t for you, there’s another way to classify your call as a lead and it’s done automatically. It’s called “Automated Lead Classification.”
Automated Lead Classification is different than keyword spotting because in keyword spotting CallRail will transcribe the phone call and tries to determine if it’s a lead based on the rules you provide. In “Automated Lead Classification,” CallRail automatically classifies a call as a lead according to the call rules you put in place. The rules are more generic and actually don’t use the keyword analysis feature that’s used in keyword spotting. You specify high-level lead criteria like the duration of calls and for which numbers. To activate Automatic Lead Classification, specify the classification criteria under the lead classification settings in CallRail (Figure 6.18 below).
 (Figure 6.18: Turn on Automated Lead Classification.)
This will include the number, call type, and the minimum duration. However, to classify a call by tag, the tag must be applied automatically in a call flow, manually, or by Keypad Scoring.
We cover call flow more in-depth in Video 8. After that, click the activate button and CallRail will start classifying your calls automatically. There’s no extra charge for this feature; it’s included in your plan. You can also manually classify your call as a lead at any time, but if you know what to look for, or listen for, then it makes sense to automate your lead classification and save yourself the headache.
Now that you have all the tagging and classification planned, you can track the ratio of your overall calls to quality calls. Just go to the Activity Dashboard and click on the Lead Funnel icon (Figure 6.19 below).
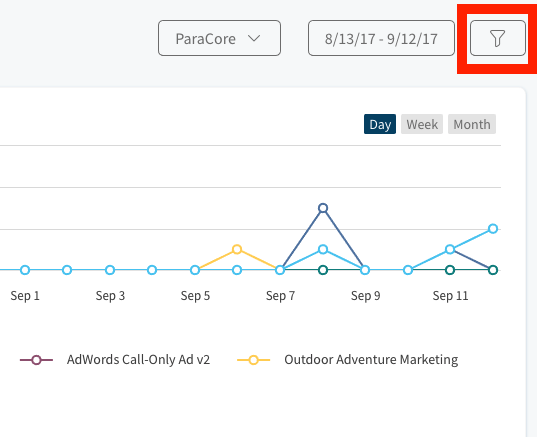 (Figure 6.19: The Lead Funnel icon is outlined with a red box.)
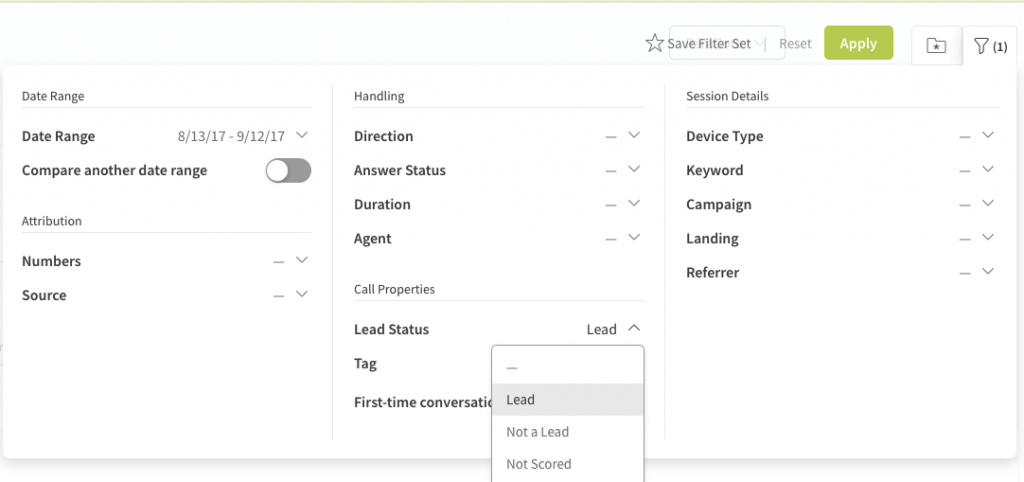 (Figure 6.20: Specify how you want to view your call report metrics.)
Specify what call properties you’d like to see, such as the lead status, and click the green apply button. It’s just that easy.
So, there you have it, that’s your overview of tagging and lead classification. Make sure you check out our next video about CallRail reports where we’ll cover how to setup your reports to gather the most important information about your call metrics.
If you enjoyed this video, please click the like button and make sure you click that red subscribe button below to receive updates on this series and more. Also, we’d like to hear from you. If you have questions or comments please post them below and I’ll see you in the next video!
Related Posts
- CallRail: Text Messaging
- CallRail: Integrations Overview
- CallRail: How to Block Spam Calls
- CallRail: Call Tagging
- CallRail: Notifications Overview
- CallRail: Activity Dashboard Overview
- CallRail: Interface Overview
- CallRail: Call Flow Tutorial
- CallRail: Form-to-Call Lead Handling
- CallRail: Multi-touch CPL Feature
- CallRail Keyword Spotting & Auto-tagging
- Call Tracking Overview
- CallRail Local Number Swap
- CallRail Bonus Features
- Using CallRail for Customer Service
- Call Flow Options
- Reporting With A Purpose
- CallRail Notifications
- How to Setup CallRail Integrations for Your PPC Campaign
- Creating & Using Phone Numbers in CallRail
- Call Tracking Explained
Want In-Depth PPC Training?
Visit the ParaCore AcademyPrevious Video
Previous BlogCallRail NotificationsNext Video
Reporting With A PurposeNext BlogCurious how we can improve your campaigns?
Schedule some time to chat with our team so we can learn more about you and your business.
